Trending Products Siway two component strength-basded ceramic tile sealant for Factories
Short Description:
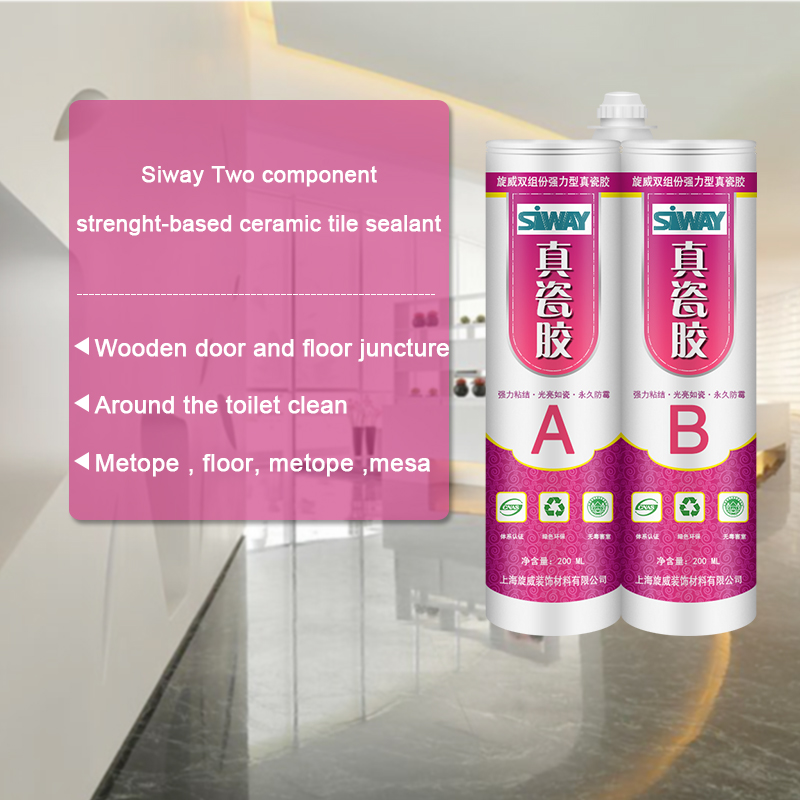
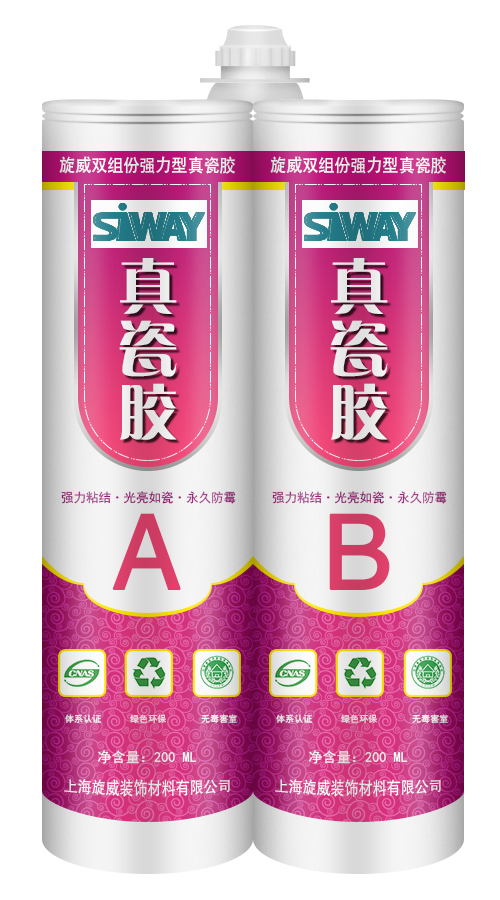
Product introduction Siway two component strength-basded ceramic tile sealant is an upgraded version of epoxy common beauty gap sealant, excellent toughness and impact resistance, surface brightness, such as porcelain, efficient, durable antibacterial mouldproof, waterproof sealing, 100% do not flow, construction simple, harmful index is far lower than the standard “GB18583-2008″ interior decoration, etc. Is widely used in high-grade kitchen, sanitary ware, high-grade family is de...
The very rich projects management experiences and one to one service model make the high importance of business communication and our easy understanding of your expectations for Trending Products Siway two component strength-basded ceramic tile sealant for Factories, Welcome to visit us at any time for business relationship established.
Product introduction
Siway two component strength-basded ceramic tile sealant is an upgraded version of epoxy common beauty gap sealant, excellent toughness and impact resistance, surface brightness, such as porcelain, efficient, durable antibacterial mouldproof, waterproof sealing, 100% do not flow, construction simple, harmful index is far lower than the standard “GB18583-2008″ interior decoration, etc. Is widely used in high-grade kitchen, sanitary ware, high-grade family is decorated in joint seal and hotel decoration,, without excitant or unpleasant smell, in use process to bring you new construction concept and aesthetic effect.
Note: the position of construction
1, metope and floor, metope and mesa, and side beams and floor juncture
2, square face plate around the seams with mesa
Around 3, round face and mesa juncture, circular beams and floor juncture
4, around the toilet clean and floor juncture
5, wooden door and floor juncture
In 6, the tub edge or metope seams with mesa
Scope of application
1, window, furniture and so on, all kinds of counter aperture, cabinets, all kinds of edges, kitchen toilet all kinds of edges, can also be used to paste all kinds of hard materials.
In 2, the guesthouse, hotel, family bath crock, implement, sink, shower room and xiancai basins of installation, waterproof, plugging and other kitchen ware and decorative processing.
Method of use
1, clean the construction surface, remove dirt, oil and other impurities, then along the hem the ceramic tile with crepe paper.
2, mount rubber mouth, combined with glue gun, glue mouth mouth before the glue to glue on the glue, the glue liquid located in cement mix, edging out front a small amount of adhesive solution, in order to avoid mixed uneven, lead to not curable, and then into the ceramic tile aperture.
3, scrape to evenness with blade, slight trim the edges.
4, this product operation time 30 minutes, 4-6 hours at 25 ℃ room temperature curing, 24 hours of maximum intensity.
You should check the valves at 500 – 600 miles, then every 6,000 miles after that.
Tools you’ll need:
10 mm socket
12 mm socket
Medium ratchet with short AND long extension
Big flat screwdriver or quarter
19 mm socket
Large ratchet
Flat feeler gauge
Torque wrench (one that works for low torques)
16 mm wrench (optional)
Need a Clymer manual? Check out https://www.clymer.com/ or https://www.youtube.com/user/ClymerManuals
Body work removal and installation: https://www.youtube.com/watch?v=Kki7S2RZBGQ
Remove the fan. The fan plug is mounted in a bracket on the frame – trace the wires, it’s easier than explaining. There are three 10 mm bolts. Two on the left and one near the center of the bike (right side of the fan) buried behind the radiator hose. The hose is pliable, push it out of your way. Use an extension. Unplugging the fan switch wire may also prove useful.
Marknet Valve Check / Adjustment Procedures: https://www.klr650.marknet.us/valves.html
I guess I lied. There is a link for the Clymers, but you still have to buy it: https://www.clymer.com/Book.aspx?bid=914&title=Kawasaki+KLR650%2c+1987-2006
Unplug the spark plug wire (leave the spark plug alone! What did it ever do to you?) and the temperature sending wire (right next to the spark plug). Remove the ignition coil. It has two wires going into the back, unplug them, then remove the 10 mm bolts holing it in place.
Remove the upper engine mount (I said I wasn’t going to to. *SPOILER ALERT* I tried to get the cover off for maybe 5 minutes to no avail. Then I gave in and took of the mount, the cover came out in about 10 seconds. Just do it). They are all 12 mm heads. Use the 16 mm wrench (not socket, like I said in the video… whoops.) to hold the plate “nut” from getting friendly with the engine.
Snip the wire ties. Get rid of the gas tank rubber doodads. Clean as much of the bike above the valve area as you can.
Take off the wire harness harness (two 10 mm bolts).
Remove the valve cover bolts, all four are 12 mm. The two on the right are straight forward. The back left takes some wire wiggling, and the front left takes a lot of wire wiggling. Store the bolts in a safe place in such a way that you know where they go when you need to put them back in. Mind their gaskets.
Valve stat sheet: https://www.klr650.marknet.us/valvclear.zip
Remove the valve cover from the left side of the bike. Be careful: the surfaces are precision machined, screw up and the chance of leaks goes up. BE GENTLE! Gentle like it’s your girlfriend / wife / whathaveyou.
Remove the two round plug on the left side of the engine. Use a big flat head screwdriver or a quarter. Use the 19 mm socket and large ratchet driver on the big hole and turn counterclockwise (the direction the wheels normally turn). There are three marks; you’re aiming for the third. It’s a straight tick mark with a T on right behind it. Watch the cam lobes. You’re at the “right” TDC (top dead center) when the tick mark by the T lines up with the lack of threads where the small cap goes AND the cam lobes all point away from each other. If you overshoot, take a breath, and spin the crank around TWICE. Watch the lobes if you’re wondering “why twice?”
Use a flat feeler gauge and check your valve shim clearances. Watch the video for the explanation.
Valve Shim Replacement: https://www.youtube.com/watch?v=R2d-V4udwaA
Use RTV Silicone Sealant and make a thin coat on both sides of the gasket. Put the gasket in place. Put the valve cover back in place from the left side of the bike. Again, BE GENTLE. You’ve made it this far, don’t fubar your precision machined surfaces now.
Replace the four cover bolts. Short on the left, long on the right. Tighten them evenly and carefully working your way up to 6 ft * lbs (that would be 71 INCH pounds).
Put the ignition coil back on, plug in the two wires on the back of it, plug in the temperature sending wire and put the spark plug cap back on the spark plug.
Put the fan back on (three bolts, 10 mm), plug it back in, put the plug back in its clip on the frame, plug the fan switch back in (bottom of the radiator).
Replace the wire ties that you snipped.
Replace the upper engine mount. All three bolts get torqued to 18 ft * lbs.
Replace the Body Work (link is up top).
Please rate and leave comments!
For a wealth of KLR 650 information, please visit KLR650.NET – Your Kawasaki KLR650 Resource!
If you decide to join, please use my referral link: https://www.klr650.net/forums/index.php?referrerid=17746
JLC-Live exhibitor, Bill Crowley, demonstrates Geocel 4500’s bonding capabilities.