professional factory provide SV-777 silicone sealant for stone for Bulgaria Manufacturers

Short Description:
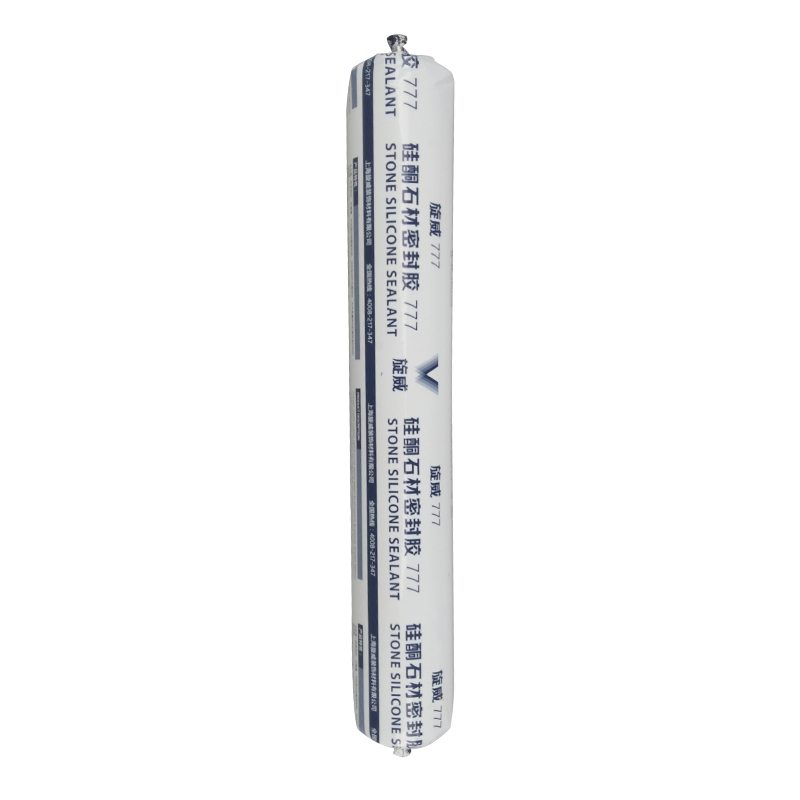
Description SV-777 silicone sealant for stone, is an elastomer sealant in modulus, single. Waterproof joints need to be sensitive to natural stone, glass and metal building clean appearance panel for sealing design, it to the moisture in the air after curing in contact, the formation of elastic rubber sealing performance, durability, weather resistance, good combination with most building materials. Key Features 1. 100% silicone 2. Minimized fluid migration 3. Low dirt pick up 4. Water &...
Our products are widely recognized and trusted by users and can meet continuously changing economic and social needs of professional factory provide SV-777 silicone sealant for stone for Bulgaria Manufacturers, If you are interested in any of our products and services, please don't hesitate to contact us. We are ready to reply you within 24 hours after receipt of your request and to create mutual un-limited benefits and business in near future.
Description
SV-777 silicone sealant for stone, is an elastomer sealant in modulus, single. Waterproof joints need to be sensitive to natural stone, glass and metal building clean appearance panel for sealing design, it to the moisture in the air after curing in contact, the formation of elastic rubber sealing performance, durability, weather resistance, good combination with most building materials.
Key Features
1. 100% silicone
2. Minimized fluid migration
3. Low dirt pick up
4. Water & weatherproof
5. Primerless adhesion to most building materials
6. 25% movement capability
Basic Application
1.Stone curtain wall sealing
2.Engineering ceramic sealing
3.Stone and other materials such as glass, metal seam sealing
4.Other uses
Technical data sheet
| Test standard | Test project | Unit | value |
| Before curing——25℃,50%R.H. | |||
| ASTM C 679 | Flow, sagging or vertical flow | mm | 0 |
| VOC | g/L | <80 | |
| GB13477 | surface drying time(25℃,50%R.H.) | min | 30 |
| Curing time(25℃,50%R.H.) | Day | 7-14 | |
| Sealant curing speed and operating time will have different with different temperatures and temperature, high temperature and high humidity can make sealant curing speed faster, rather low temperature and low humidity are slower.21 days after curing——25℃,50%R.H. | |||
| GB13477 | Durometer Hardness | Shore A | 30 |
| GB13477 | The ultimate tensile strength | Mpa | 0.7 |
| Temperature stability | ℃ | -50~+150 | |
| GB13477 | Movement capability | % | 25 |
| ASTM C 1248 | Pollution / oil, natural stone | No | |
Certification
25HM GB/T 23261-2009;ASTM C920-2011
Color
Black,White,Gray
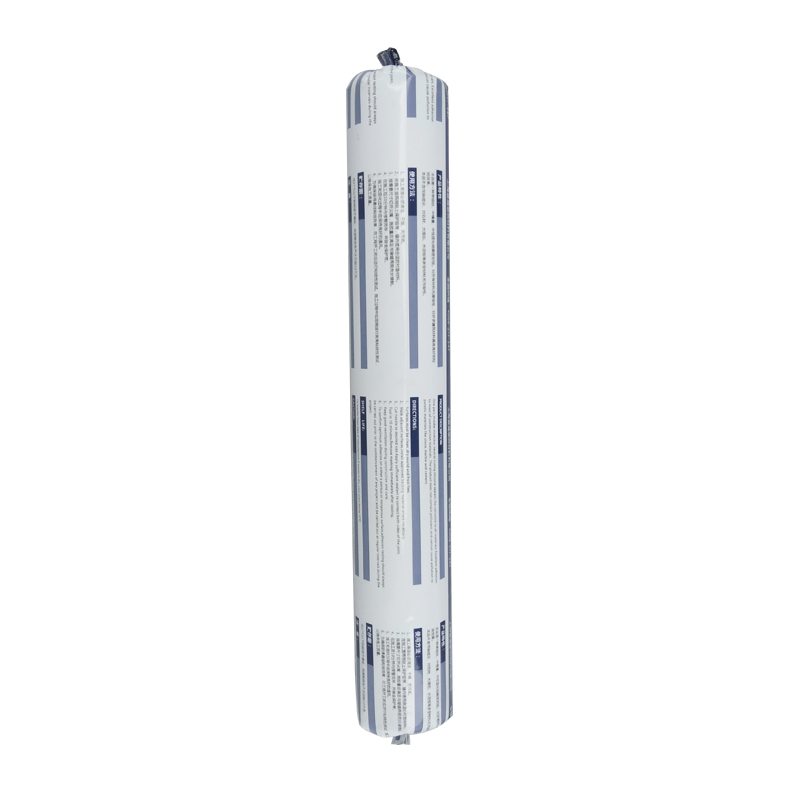
Package
300ml in cartridge * 24 per box, 590ml in sausage *20 per box
Shelf life
12 months
Note
If you want the TDS or MSDS or other details, please contact with our sales person.
Get the colored set here… https://amzn.to/2fMSoyw
Get the metallic set here… https://amzn.to/2eSNfCH
3 DIFFERENT SILICONE RINGS FOR THE PRICE OF ONE: Get the best value with our high quality 3 silicone ring pack. Each pack includes one striped ring, a solid black ring and a solid grey ring.
ALL ONE PIECE – WILL NOT SEPARATE and HIGHLY DURABLE LIGHT WEIGHT: As the name says, our Tough Rings are TOUGH! Made out of high quality Premium Silicone Rubber our wedding bands can stand the test of time and any Crossfit WOD you can throw at it. Protect your hands not your ring!
STYLISH LOOK: Stay active and look great while doing it. Our rings have been designed by award winning artist to give you a bold stylish look while maintaining a classic wedding ring feel.
FREE SIZE CHART! Please see the size chart in the pictures and measure for a perfect fit! Please contact us if you order the wrong size, we will make sure you get rings that fit!
Product Description
Metallic 3 Silicone Rings by KeepFit
Strong, Durable and Beautiful – Just Like Your Marriage.
Do you love your crossfit workouts, WOD’s, exploring the great outdoors or just staying active? Does your traditional metal or tungsten wedding ring get in the way or cut into your hands while kicking it into high gear during your butterfly kip, pull ups, hiking, fly fishing or any other activity where your grip and hands are so important for success? Why put up with that? KeepFit’s Tough rings solves this problem for you. No more stressing about hurting yourself or ruining another wedding band.
Tough Ring Benefits
- 3 different color rings for the price of one!
- Made from Highly durable silicone rubber that won’t scuff!
- Easy to take on and off, great for people with arthritis!
- Never ruin another wedding band again!
- Great for Crossfit, WOD’s, Fly Fishing, Swimming, Running, Cycling, Mountain biking, Hiking, Tough Mudders,Spartan Race, Baseball, Construction workers, Farmers, Cross Country, Tennis and anyone with an active lifestyle!
Tough Ring Specs
- Hypoallergenic – made of 100% Medical Grade Silicone rubber.
- Dimensions: 0.87cm Wide and 0.15cm Thick.
- Look: Beveled exterior for a beautiful and clean appearance.
- Feel: Durable, lightweight and barely there feel.
- Tensile Strength ~172N
Are you ready to take your love with you wherever you go and through whatever you do? Protect your hands and quite ruining your beautiful wedding band an add our Tough Rings to your “Cart” by using the “Add to Cart” feature on the top right corner of your screen.
You should check the valves at 500 – 600 miles, then every 6,000 miles after that.
Tools you’ll need:
10 mm socket
12 mm socket
Medium ratchet with short AND long extension
Big flat screwdriver or quarter
19 mm socket
Large ratchet
Flat feeler gauge
Torque wrench (one that works for low torques)
16 mm wrench (optional)
Need a Clymer manual? Check out https://www.clymer.com/ or https://www.youtube.com/user/ClymerManuals
Body work removal and installation: https://www.youtube.com/watch?v=Kki7S2RZBGQ
Remove the fan. The fan plug is mounted in a bracket on the frame – trace the wires, it’s easier than explaining. There are three 10 mm bolts. Two on the left and one near the center of the bike (right side of the fan) buried behind the radiator hose. The hose is pliable, push it out of your way. Use an extension. Unplugging the fan switch wire may also prove useful.
Marknet Valve Check / Adjustment Procedures: https://www.klr650.marknet.us/valves.html
I guess I lied. There is a link for the Clymers, but you still have to buy it: https://www.clymer.com/Book.aspx?bid=914&title=Kawasaki+KLR650%2c+1987-2006
Unplug the spark plug wire (leave the spark plug alone! What did it ever do to you?) and the temperature sending wire (right next to the spark plug). Remove the ignition coil. It has two wires going into the back, unplug them, then remove the 10 mm bolts holing it in place.
Remove the upper engine mount (I said I wasn’t going to to. *SPOILER ALERT* I tried to get the cover off for maybe 5 minutes to no avail. Then I gave in and took of the mount, the cover came out in about 10 seconds. Just do it). They are all 12 mm heads. Use the 16 mm wrench (not socket, like I said in the video… whoops.) to hold the plate “nut” from getting friendly with the engine.
Snip the wire ties. Get rid of the gas tank rubber doodads. Clean as much of the bike above the valve area as you can.
Take off the wire harness harness (two 10 mm bolts).
Remove the valve cover bolts, all four are 12 mm. The two on the right are straight forward. The back left takes some wire wiggling, and the front left takes a lot of wire wiggling. Store the bolts in a safe place in such a way that you know where they go when you need to put them back in. Mind their gaskets.
Valve stat sheet: https://www.klr650.marknet.us/valvclear.zip
Remove the valve cover from the left side of the bike. Be careful: the surfaces are precision machined, screw up and the chance of leaks goes up. BE GENTLE! Gentle like it’s your girlfriend / wife / whathaveyou.
Remove the two round plug on the left side of the engine. Use a big flat head screwdriver or a quarter. Use the 19 mm socket and large ratchet driver on the big hole and turn counterclockwise (the direction the wheels normally turn). There are three marks; you’re aiming for the third. It’s a straight tick mark with a T on right behind it. Watch the cam lobes. You’re at the “right” TDC (top dead center) when the tick mark by the T lines up with the lack of threads where the small cap goes AND the cam lobes all point away from each other. If you overshoot, take a breath, and spin the crank around TWICE. Watch the lobes if you’re wondering “why twice?”
Use a flat feeler gauge and check your valve shim clearances. Watch the video for the explanation.
Valve Shim Replacement: https://www.youtube.com/watch?v=R2d-V4udwaA
Use RTV Silicone Sealant and make a thin coat on both sides of the gasket. Put the gasket in place. Put the valve cover back in place from the left side of the bike. Again, BE GENTLE. You’ve made it this far, don’t fubar your precision machined surfaces now.
Replace the four cover bolts. Short on the left, long on the right. Tighten them evenly and carefully working your way up to 6 ft * lbs (that would be 71 INCH pounds).
Put the ignition coil back on, plug in the two wires on the back of it, plug in the temperature sending wire and put the spark plug cap back on the spark plug.
Put the fan back on (three bolts, 10 mm), plug it back in, put the plug back in its clip on the frame, plug the fan switch back in (bottom of the radiator).
Replace the wire ties that you snipped.
Replace the upper engine mount. All three bolts get torqued to 18 ft * lbs.
Replace the Body Work (link is up top).
Please rate and leave comments!
For a wealth of KLR 650 information, please visit KLR650.NET – Your Kawasaki KLR650 Resource!
If you decide to join, please use my referral link: https://www.klr650.net/forums/index.php?referrerid=17746


