High Efficiency Factory Siway two component strength-basded ceramic tile sealant to Estonia Importers
Short Description:
Product introduction Siway two component strength-basded ceramic tile sealant is an upgraded version of epoxy common beauty gap sealant, excellent toughness and impact resistance, surface brightness, such as porcelain, efficient, durable antibacterial mouldproof, waterproof sealing, 100% do not flow, construction simple, harmful index is far lower than the standard “GB18583-2008″ interior decoration, etc. Is widely used in high-grade kitchen, sanitary ware, high-grade family is de...
We keep improving and perfecting our products and service. At the same time, we work actively to do research and development for High Efficiency Factory Siway two component strength-basded ceramic tile sealant to Estonia Importers, Our professional technical team will be wholeheartedly at your service. We sincerely welcome you to visit our website and company and send us your inquiry.
Product introduction
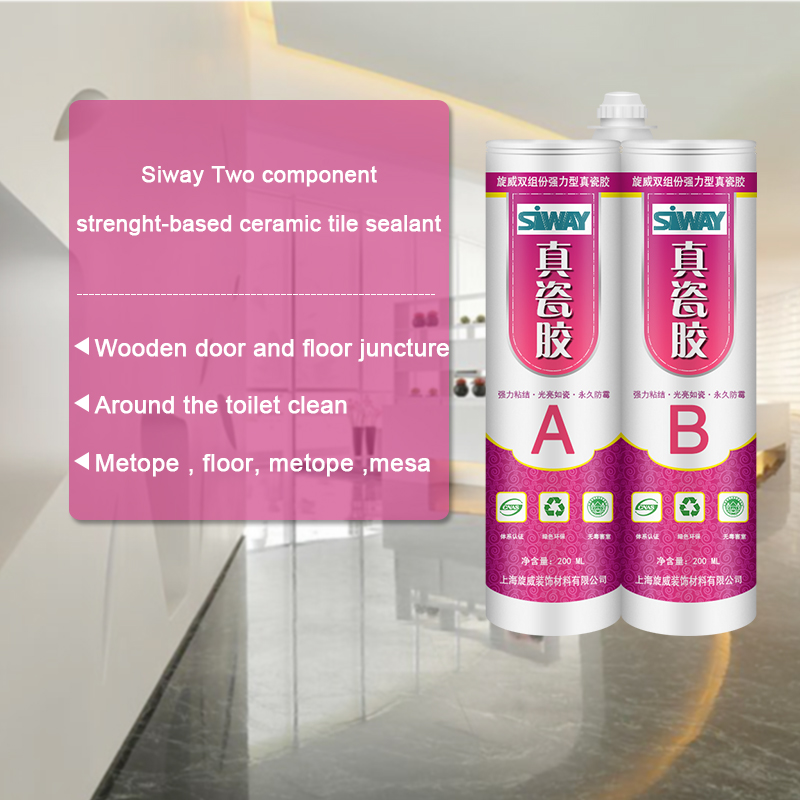
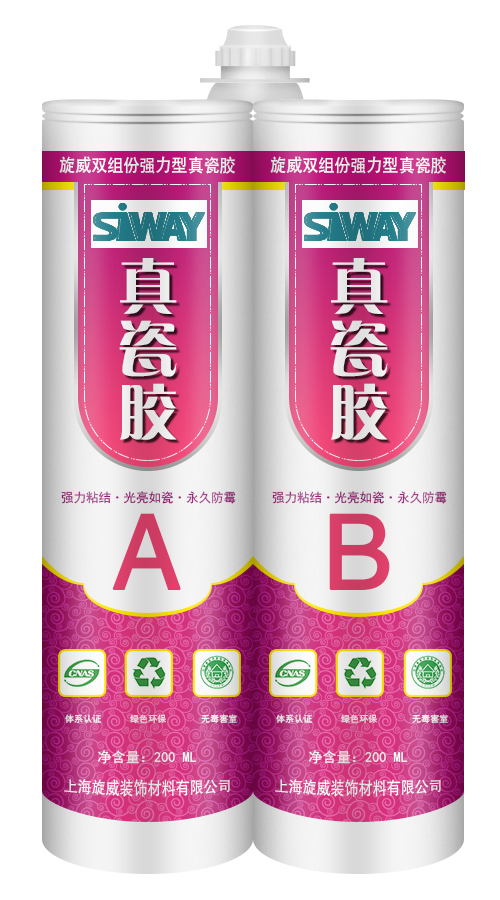
Siway two component strength-basded ceramic tile sealant is an upgraded version of epoxy common beauty gap sealant, excellent toughness and impact resistance, surface brightness, such as porcelain, efficient, durable antibacterial mouldproof, waterproof sealing, 100% do not flow, construction simple, harmful index is far lower than the standard “GB18583-2008″ interior decoration, etc. Is widely used in high-grade kitchen, sanitary ware, high-grade family is decorated in joint seal and hotel decoration,, without excitant or unpleasant smell, in use process to bring you new construction concept and aesthetic effect.
Note: the position of construction
1, metope and floor, metope and mesa, and side beams and floor juncture
2, square face plate around the seams with mesa
Around 3, round face and mesa juncture, circular beams and floor juncture
4, around the toilet clean and floor juncture
5, wooden door and floor juncture
In 6, the tub edge or metope seams with mesa
Scope of application
1, window, furniture and so on, all kinds of counter aperture, cabinets, all kinds of edges, kitchen toilet all kinds of edges, can also be used to paste all kinds of hard materials.
In 2, the guesthouse, hotel, family bath crock, implement, sink, shower room and xiancai basins of installation, waterproof, plugging and other kitchen ware and decorative processing.
Method of use
1, clean the construction surface, remove dirt, oil and other impurities, then along the hem the ceramic tile with crepe paper.
2, mount rubber mouth, combined with glue gun, glue mouth mouth before the glue to glue on the glue, the glue liquid located in cement mix, edging out front a small amount of adhesive solution, in order to avoid mixed uneven, lead to not curable, and then into the ceramic tile aperture.
3, scrape to evenness with blade, slight trim the edges.
4, this product operation time 30 minutes, 4-6 hours at 25 ℃ room temperature curing, 24 hours of maximum intensity.
START TO FNISH – Time Lapse photography and commentary showing how to install a right-hand inswing patio door.
The opening for this door was 72″ wide by 80″ tall. This leaves 1/2″ around the door for adjustments.
1. Install a wood sill and framing in the opening if needed to achieve the correct sized opening.
2. Place lots of caulk or sill pan on the concrete. The sill pan must be used in some wood construction installations if water may seep through the patio door joints.
3. When placing the patio door, check the bottom and top plates to make sure it is level. Make sure the door jamb is plumb on both sides, meaning that the door is plumb in and out of the opening and left and right of the opening.
4. Place shims under the left or right door jamb to level the door. Place shims behind all the hinges and any other large gaps that are required to create an even reveal around the doors. Use plastic shims so that water will not affect them.
5. Install two long screws in the top hinges to attach the doors to the existing structure. This will help keep the doors structurally in place.
6. Run caulk around the threshold, trim, and any other gaps where water may enter. Fill other gaps with window foam insulation.
7. Install case molding around the door for a finished look.
The install time took me 5 hours because I had two old patio sliding doors to remove and plenty of prep work such as removing the old caulking and throwing away the old patio doors.
Is your RV’s roof in need of repair?
I found this stuff called Ultra Bond at Home Depot for $26 a roll. I Tried it on the outside cabover area of my class C RV today. Its super sticky.
UPDATE: I screwed three 4 inch long woodscrews along the edge on both sides of the bunk area and its still holding tight 3-22-2014.