Factory selling SV-8800 Silicone Sealant for Insulating Glass to Florida Manufacturer

Short Description:
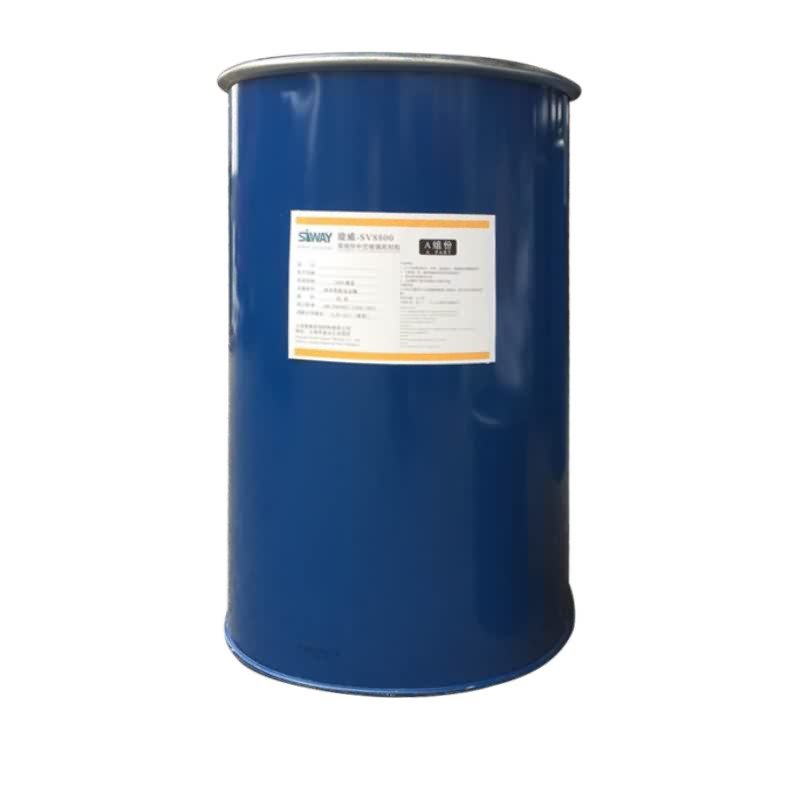
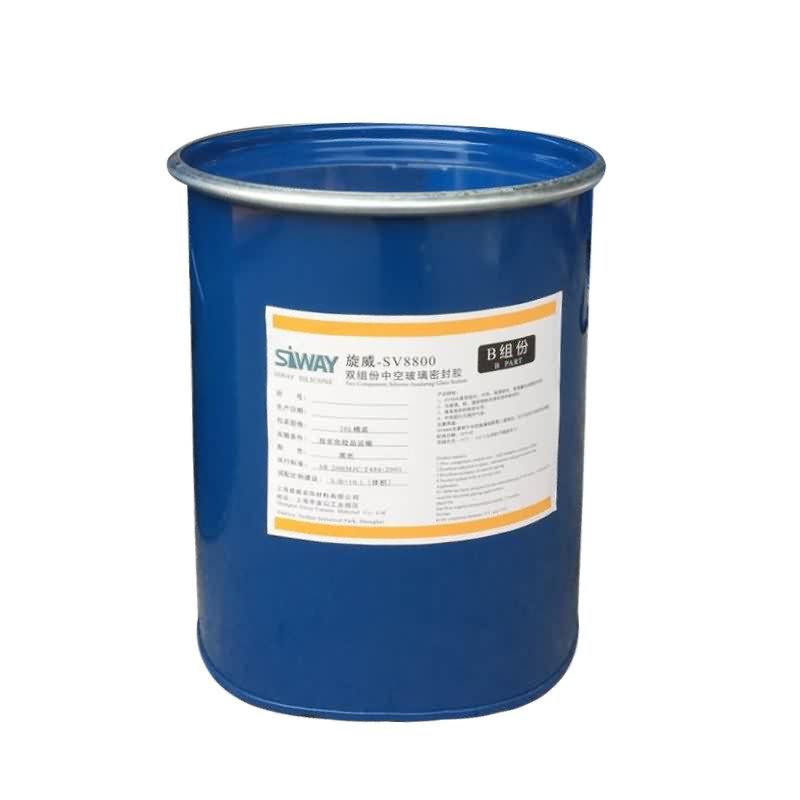
Description SV-8800 is two components, high modulus; neutral curing silicone sealant specifically developed for assembly of high performance insulated glass units as secondary sealing material. Where to use It is a two-component silicone that offers variable work life with high bonding strength to maintain the integrity of insulating glass unit, suits both commercial and residential IGU. Key Features 1. High Modulus 2. UV resistance 3. Low vapor and gas transmission 4. Primerless adhesion...
As for competitive prices, we believe that you will be searching far and wide for anything that can beat us. We can state with absolute certainty that for such quality at such prices we are the lowest around for Factory selling SV-8800 Silicone Sealant for Insulating Glass to Florida Manufacturer, Our company maintains safe business mixed by truth and honesty to keep long-term relationships with our customers.
Description
SV-8800 is two components, high modulus; neutral curing silicone sealant specifically developed for assembly of high performance insulated glass units as secondary sealing material.
Where to use
It is a two-component silicone that offers variable work life with high bonding strength to maintain the integrity of insulating glass unit, suits both commercial and residential IGU.
Key Features
1. High Modulus
2. UV resistance
3. Low vapor and gas transmission
4. Primerless adhesion to coated glass
5. 100% compatible to SV-8890
Technical data sheet
| Test standard | Test project | Unit | value |
| Before curing——25℃,50%R.H. | |||
| GB13477 | Specific gravity(After mixing) | 1.33 | |
| GB13477 | Operating time | min | 20-40 |
| GB13477 | surface drying time(25℃,50%R.H.) | min | 80-188 |
| corrosivity | No | ||
| 7 days after curing——25℃,50%R.H. | |||
| GB/T 531 | Durometer Hardness | Shore A | 40 |
| GB13477 | The tensile modulus at 12.5% elongation | Mpa | 0.18 |
| The ultimate tensile strength | Mpa | 0.92 | |
| GB13477 | Elongation limit (fracture) | % | 150 |
Certification
GB-24266-2009;
Color
Component A(Base) – White, Component B(Catalyst)- Black
Package
1. Component A(Base): (190L), Component B(Catalyst) (18.5L)
2. Component A(Base):24.5kg (18L), Component B(Catalyst): 1.9kg (1.8L)
Shelf life
12 months
Note
If you want the TDS or MSDS or other details, please contact with our sales person.
Watch as the Dremel Multi-Max and MM501 Carbide Grout Blade remove old grout around a bath tub to be replaced with clean grout for a refreshed look.
The action of the Dremel Multi-Max coupled with its uniquely shaped grout blade makes it the perfect solution for repairing a baths surround.
For this project we’ll use the Dremel Multi-Max oscillating tool and MM501 one-sixteenth inch Carbide Grout Blade. Begin this project by inserting the carbide grout blade into the tool. Tighten the screw with the allen wrench to secure the blade in the holder. Set the tool to medium to high speed then guide the blade into the grout. To protect your tub we recommend that you apply a line of tape around the top edge of your tub first. You can also tape the tile for added protection. In smooth even motions continue to remove the grout on all sides.
Depending on the hardness of the grout a few passes may be required. If needed the blade can be easily rotated to get into tight corners. Be sure to unplug the tool before changing the blade. Remember to keep the blade parallel to the tub ledge, do not allow it to rest on the tub to avoid any scratches. This also sets the blade to a right angle at the wall. Put the blade in the grout and with a smooth motion you’ll prevent tiles for being nicked. To control plunge depth use the carbide grit line on the blade as an indicator. Do not plunge beyond the grit line as you could damage the backer board material. When you’re finished dust the area, remove the layer of tape and whipe clean with a damp cloth. Start your line of cualk working from the corner’s first. Once a smooth bead is all that’s left, wet your finger and smooth out the caulk. Let it set for the recommended time and your bath is as good as new.
Learn more about Dremel Multi-Max tools: https://goo.gl/D0QXLM
Comparison and tutorial, What to look for and avoid !
some hoses can be a little cheaper online or auction sites, but are you really getting anything good? – Watch the video to learn more about what makes a BAD hose !
https://viperperformance.co.uk