Factory Price For SV-888 Weatherproof Silicone Sealant to Ukraine Factory


Short Description:
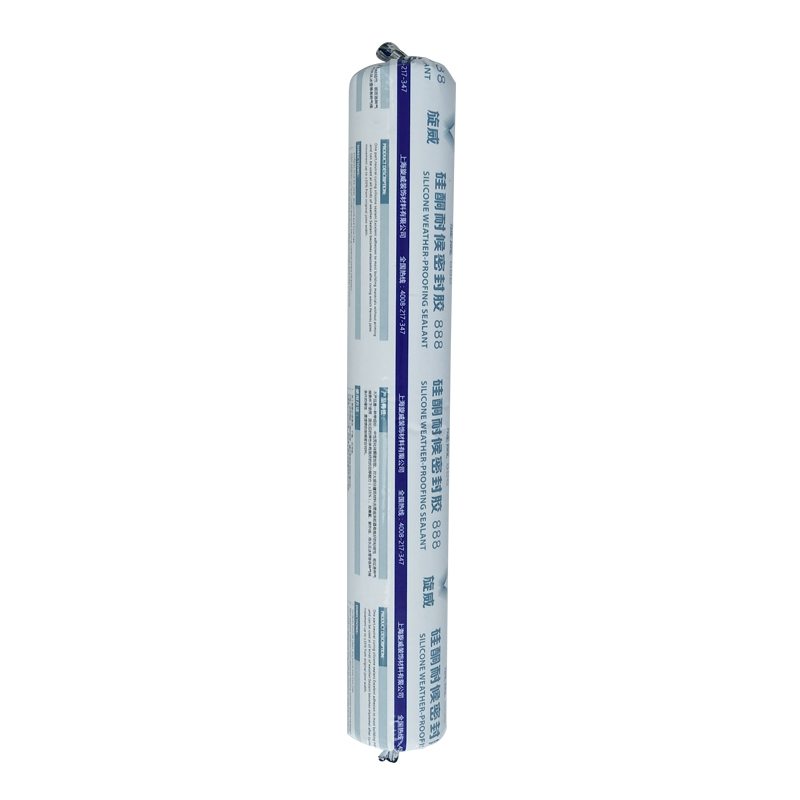
Description SV-888 silicone weatherproof sealant is one component, neutral cure silicone sealant, designed for glass curtain wall, aluminum curtain wall and building exterior design, has excellent weathering properties, it can form durable and most building materials, waterproof and flexible interface. Key Features 1. 100% silicone 2. Medium modulus (25% movement capability) 3. UV resistance & weatherproof 4. Primerless adhesion to most building materials Basic Application 1.All ...
We stick to the principle of "quality first, service first, continuous improvement and innovation to meet the customers" for the management and "zero defect, zero complaints" as the quality objective. To perfect our service, we provide the products with the good quality at the reasonable price for Factory Price For SV-888 Weatherproof Silicone Sealant to Ukraine Factory, "Create Values,Serving Customer!" is the aim we pursue. We sincerely hope that all customers will establish long term and mutually beneficial cooperation with us.If you wish to get more details about our company, Please contact with us now
Description
SV-888 silicone weatherproof sealant is one component, neutral cure silicone sealant, designed for glass curtain wall, aluminum curtain wall and building exterior design, has excellent weathering properties, it can form durable and most building materials, waterproof and flexible interface.
Key Features
1. 100% silicone
2. Medium modulus (25% movement capability)
3. UV resistance & weatherproof
4. Primerless adhesion to most building materials
Basic Application
1.All kinds of glass curtain wall weatherproof seal
2.For metal (aluminum) curtain wall, enamel curtain wall weatherproof seal
3.Joint sealing of concrete and metal
4.Roof joint seal
Technical data sheet
| Test standard | Test project | Unit | value |
| Before curing——25℃,50%R.H. | |||
| GB13477 | Flow, sagging or vertical flow | mm | 0 |
| GB13477 | Operating time | min | 10 |
| GB13477 | surface drying time(25℃,50%R.H.) | min | 20 |
| Deep curing | mm/day | 1-2 | |
| Sealant curing speed and operating time will have different with different temperatures and temperature, high temperature and high humidity can make sealant curing speed faster, rather low temperature and low humidity are slower.21 days after curing——25℃,50%R.H. | |||
| GB13477 | Durometer Hardness | Shore A | 28 |
| GB13477 | The ultimate tensile strength | Mpa | 0.65 |
| Temperature stability | ℃ | -50~+150 | |
| GB13477 | Movement capability | % | 25 |
Certification
GB/T 22083-G-35;ASTM C920
Color
Black, white, grey
Package
300ml in cartridge * 24 per box, 590ml in sausage *20 per box
Shelf life
12 months
Note
If you want the TDS or MSDS or other details, please contact with our sales person.
roof repair crest hill il – How to use rubber on a roof – Start making your own internet bussines today
How to calk a rubber roof – Start making your own internet bussines today How to Install a Rubber Roof on a RV Trailer Camping (Literature Subject) · caulking RV roof · dicor · How To Repair Tent Trailer Corner Roof Caps · how to seal RV roof · https://www Posted in Beginning RVer, General, RV Maintenance, RV products, RV Safety, RV Tips & Hints | Tags: applying roof sealant on RV, how to maintain RV roof seals, how to seal RV roof, RV how to videos, RV maintenance, RV products, RV roof maintenance, RV roof sealant, RV roof tips, RV tips & hints Step-by-Step How to Repair a Roof Edge · Type of Plywood Used on Roofing · How to Replace Rotted Rafter Ends on a Gable Roof · Can Oriented Strand Board (OSB) be Used for Roofing
Explore Daniel Melcher’s board “How to repair rubber roof” on Pinterest, the world’s catalog of ideas
Leak on flat roof In my home (includes DIY) MoneySaving
Asphalt Roof Leak Repair Elastomeric Coating Systems
FLAT ROOF LEAK REPAIR – CONTENTS: diagnosing the source of leaks on a flat or low slope roof; how to install an impermeable roof sealant compound on a flat concrete roof
Licensed Roofing Contractor Illinois Lic
I recently (May, 2015) hired the top flat roofing company in the area and they documented the roof issues in pictures before starting work pks truck & trailer repair crest hill il 60403-2489.
crest hill il roof repair | call 877-705-4313 toll-free.
Here’s how to install a rubber roof How to seal your RV roof with Dicor lap sealantDicor lap dealantLap sealantSelf leveling lap sealantHow to seal rv roof How to Fix Rotted Roof Decking · How to Replace Roof Sheathing · Step-by-Step How to Repair a Roof Edge · How to Replace Rotted Rafter Ends on a Gable Roof
At Ace Roofing Siding Remodeling we are committed to providing the Vidor, TX area with quality products and outstanding workmanship when it comes to all your how to repair rubber roof needs
Asphalt roof leak repair · felt roof repair · flat roof leak repair · flat roof sealant · flat roof sealer · how to repair a flat roof · leak on flat roof · liquid roof repair · liquid waterproofer · paint on waterproofer · roof leak repair · roof sealant · waterproof paint · Previous
Asphalt Roof Leak Repair Elastomeric Coating Systems Asphalt roof repairs are easily fixed with our elastomeric roof coatings or our fiberglass embedded roof coating systems
Surprising solution to a problem balcony is flat roof leak repair
Licensed roofing contractor illinois – Start making your own internet bussines today Are you seeking for top Flat Roofing Company Calgary
Roofing: How To Install A Rubber Roof | Rubber Roofing Material | Rolled Roofing Menards
You should check the valves at 500 – 600 miles, then every 6,000 miles after that.
Tools you’ll need:
10 mm socket
12 mm socket
Medium ratchet with short AND long extension
Big flat screwdriver or quarter
19 mm socket
Large ratchet
Flat feeler gauge
Torque wrench (one that works for low torques)
16 mm wrench (optional)
Need a Clymer manual? Check out https://www.clymer.com/ or https://www.youtube.com/user/ClymerManuals
Body work removal and installation: https://www.youtube.com/watch?v=Kki7S2RZBGQ
Remove the fan. The fan plug is mounted in a bracket on the frame – trace the wires, it’s easier than explaining. There are three 10 mm bolts. Two on the left and one near the center of the bike (right side of the fan) buried behind the radiator hose. The hose is pliable, push it out of your way. Use an extension. Unplugging the fan switch wire may also prove useful.
Marknet Valve Check / Adjustment Procedures: https://www.klr650.marknet.us/valves.html
I guess I lied. There is a link for the Clymers, but you still have to buy it: https://www.clymer.com/Book.aspx?bid=914&title=Kawasaki+KLR650%2c+1987-2006
Unplug the spark plug wire (leave the spark plug alone! What did it ever do to you?) and the temperature sending wire (right next to the spark plug). Remove the ignition coil. It has two wires going into the back, unplug them, then remove the 10 mm bolts holing it in place.
Remove the upper engine mount (I said I wasn’t going to to. *SPOILER ALERT* I tried to get the cover off for maybe 5 minutes to no avail. Then I gave in and took of the mount, the cover came out in about 10 seconds. Just do it). They are all 12 mm heads. Use the 16 mm wrench (not socket, like I said in the video… whoops.) to hold the plate “nut” from getting friendly with the engine.
Snip the wire ties. Get rid of the gas tank rubber doodads. Clean as much of the bike above the valve area as you can.
Take off the wire harness harness (two 10 mm bolts).
Remove the valve cover bolts, all four are 12 mm. The two on the right are straight forward. The back left takes some wire wiggling, and the front left takes a lot of wire wiggling. Store the bolts in a safe place in such a way that you know where they go when you need to put them back in. Mind their gaskets.
Valve stat sheet: https://www.klr650.marknet.us/valvclear.zip
Remove the valve cover from the left side of the bike. Be careful: the surfaces are precision machined, screw up and the chance of leaks goes up. BE GENTLE! Gentle like it’s your girlfriend / wife / whathaveyou.
Remove the two round plug on the left side of the engine. Use a big flat head screwdriver or a quarter. Use the 19 mm socket and large ratchet driver on the big hole and turn counterclockwise (the direction the wheels normally turn). There are three marks; you’re aiming for the third. It’s a straight tick mark with a T on right behind it. Watch the cam lobes. You’re at the “right” TDC (top dead center) when the tick mark by the T lines up with the lack of threads where the small cap goes AND the cam lobes all point away from each other. If you overshoot, take a breath, and spin the crank around TWICE. Watch the lobes if you’re wondering “why twice?”
Use a flat feeler gauge and check your valve shim clearances. Watch the video for the explanation.
Valve Shim Replacement: https://www.youtube.com/watch?v=R2d-V4udwaA
Use RTV Silicone Sealant and make a thin coat on both sides of the gasket. Put the gasket in place. Put the valve cover back in place from the left side of the bike. Again, BE GENTLE. You’ve made it this far, don’t fubar your precision machined surfaces now.
Replace the four cover bolts. Short on the left, long on the right. Tighten them evenly and carefully working your way up to 6 ft * lbs (that would be 71 INCH pounds).
Put the ignition coil back on, plug in the two wires on the back of it, plug in the temperature sending wire and put the spark plug cap back on the spark plug.
Put the fan back on (three bolts, 10 mm), plug it back in, put the plug back in its clip on the frame, plug the fan switch back in (bottom of the radiator).
Replace the wire ties that you snipped.
Replace the upper engine mount. All three bolts get torqued to 18 ft * lbs.
Replace the Body Work (link is up top).
Please rate and leave comments!
For a wealth of KLR 650 information, please visit KLR650.NET – Your Kawasaki KLR650 Resource!
If you decide to join, please use my referral link: https://www.klr650.net/forums/index.php?referrerid=17746


