Factory making SV-GT2000 High-speed rail subway silicone sealant to Puerto Rico Manufacturer
Short Description:
Description SV-GT2000 High-speed rail subway silicone sealant is a one-component, low modulus, neutral curing adhesive. For most of the stone, ceramic and cement components, can produce excellent adhesion Key Features (1) easy to use: can be used at any time out; (2) excellent thixotropy and extrusion, at any temperature (-40 ℃ to 100 ℃) can be extruded; (3) good adhesion, the stone, ceramics and cement components and other building materials with excellent adhesion properties; no poll...
We are committed to providing easy,time-saving and money-saving one-stop purchasing service of consumer for Factory making SV-GT2000 High-speed rail subway silicone sealant to Puerto Rico Manufacturer, We welcome new and old customers from all walks of life to contact us for future business relationships and mutual success.
Description
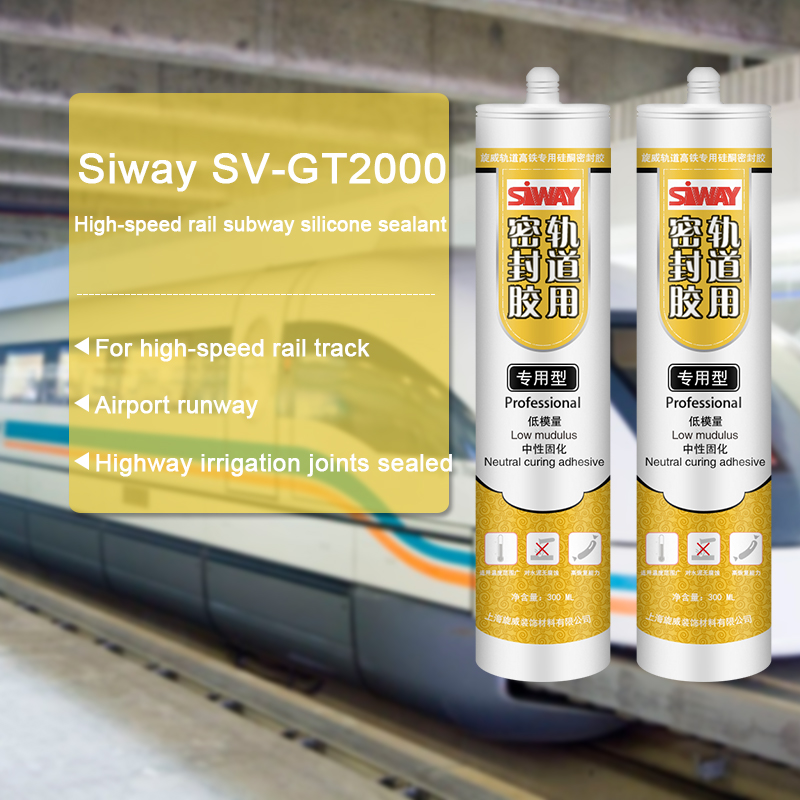
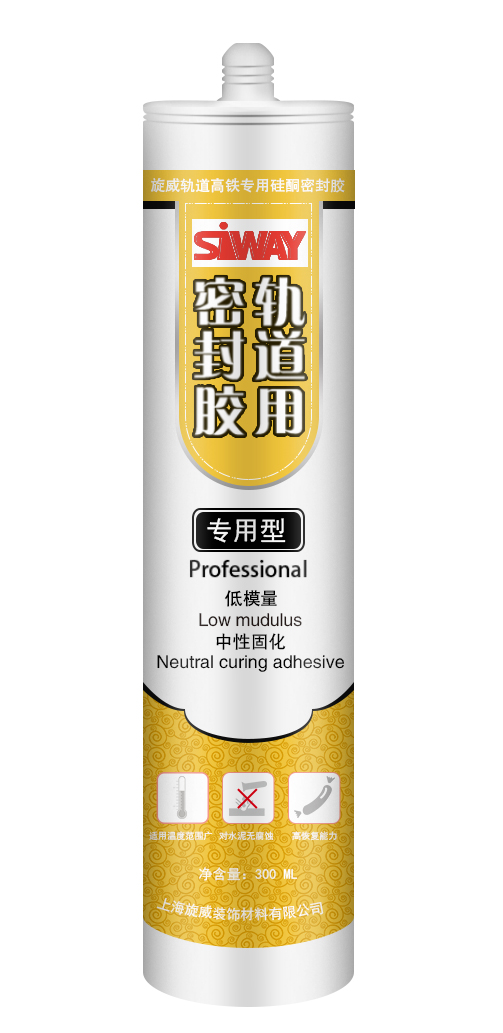
SV-GT2000 High-speed rail subway silicone sealant is a one-component, low modulus, neutral curing adhesive. For most of the stone, ceramic and cement components, can produce excellent adhesion
Key Features
(1) easy to use: can be used at any time out;
(2) excellent thixotropy and extrusion, at any temperature (-40 ℃ to 100 ℃) can be extruded;
(3) good adhesion, the stone, ceramics and cement components and other building materials with excellent adhesion properties; no pollution of the porous material;
(4) excellent weather resistance, aging performance, excellent tensile and compression resilience, can carry ± 30% displacement capacity;
(5) neutral curing, stone, cement and other building materials without corrosive, to overcome the shortcomings of acid corrosion material.
(6) base modulus: passive deformation occurs when the role of moderate stress on the concrete substrate to ensure that the concrete surface is not destroyed;
(7) high elasticity high recovery capacity: can be repeated from the seams with the movement, fast response fast response, permanent deformation of small.
Basic Application
1.For high-speed rail track, airport runway, highway irrigation joints sealed, can withstand large displacement;
2.Can also be used for other concrete pavement sealing, subway engineering, tunnels, bridges and other projects sealed.
Technical data sheet
|
Test project |
Unit | value | ||
| surface drying time(25℃,50%R.H.) | min | ≤60 | ||
| Sagging(70℃) | vertical | mm | ≤3 | |
| Horizontal | mm | 0 | ||
| Mass loss rate | / | ≤5% | ||
| Elastic recovery rate | / | ≥80% | ||
| 100% tensile strength | 23℃ | MPa | ≤0.3 | |
| -20℃ | MPa | ≤0.3 | ||
| tensile strength | 23℃ | MPa | ≥1.0 | |
| -20℃ | MPa | ≤2.0 | ||
| 168 h after thermal aging (80 ℃) | MPa | ≥0.8 | ||
| 168 h after alkali treatment | MPa | ≥0.8 | ||
| Breaking elongation | 23℃ | / | ≥800% | |
| -20℃ | / | ≥600% | ||
| 168 h after thermal aging (80 ℃) | / | ≥600% | ||
| 168 h after alkali treatment | / | ≥600% | ||
| Bond strength | 23℃ | / | No damaging | |
| -20℃ | / | No damaging | ||
| 168 h after thermal aging (80 ℃) | / | No damaging | ||
| 96 h after immersion | / | No damaging | ||
Color
Black, White, Gray
Package
300ml in cartridge * 24 per box, 590ml in sausage *20 per box
Shelf life
12 months
Note
If you want the TDS or MSDS or other details, please contact with our sales person.
Making a Cavity Pour Mold with Mold Max 30 RTV Silicone Rubber from Smooth-On.
Our model is a hand-carved hard wood 3-dimensional figure. Drill an air release hole in to the middle of a baseboard. Secure model to baseboard with screws. Apply plastic wrap to the original model to protect the surface. Cover the model with 1/2-inch (1.3 cm) clay blanket. Create a 2-inch (5.1 cm) flange for registration. Build a 3-inch (7.6 cm) clay dividing wall and apply clay supports. Drill indentations in the baseboard to register shell. Build a clay pour spout and a 1/2-inch clay dam. Apply Sonite Wax to baseboard and then apply Ease Release 200 to the entire surface.
Measure and mix duoMatrix NEO with a mix ratio of 2A:1B. Combine parts and mix thoroughly. For the first layer, apply a detail coat to the first half. Measure and mix duoMatrix NEO with chopped fiber. Apply this as the second layer. Apply a third layer of duoMatrix NEO without chopped fiber. A wood support leg is attached using duoMatrix NEO. Let cure for one hour.
Once the NEO has cured, remove the dividing wall. Drill indentations into shell for registration. Build a clay dam and pour spout. Apply Sonite Wax to baseboard and exposed shell and then apply Ease Release 200 to the entire surface. Measure and mix NEO for the second half of the support shell, following the same procedure used to create the first half. Again, a wood support leg is attached using NEO and the shell is allowed to cure one hour at room temperature. A rasp is used to create a smooth flange edge, and then three holes are drilled through the support shell. Bolts will help secure the support shell during casting.
Demold the support shell halves, remove the plastic wrap from the model, and then remove clay from the support shell. Create vent holes in support shell to allow air to escape. A 1/4-inch (6 mm) drill bit is used to drill holes through the support shell for a total of six air vents. Apply release agent to both the model and support shell. Register the support shell over the model and secure. Use bolts to hold the support shell halves together. Drywall screws are used to secure the support shell to the baseboard. Seal all seams with a hot glue gun. Place drinking straws into pre-drilled holes for air release, using clay to help secure and seal the straw. Only 1/4-inch of the straw will go into the support shell. IMPORTANT: Do not allow the drinking straws to touch the model. Trim the top two straws for easier access to the pour spout.
Measure and mix Mold Max 30 silicone rubber. Then vacuum the Mold Max 30. After vacuuming, pour Mold Max 30 into the pour spout. Cap the top of the straws with clay to stop the flow of rubber, saving material. Continue to pour rubber until the cavity is filled. Let Mold Max 30 rubber cure for 16 hours at room temperature. Once cured, remove the support shell and rubber mold from the model. Perfect detail is captured from the original model.
How to cast into the mold:
The mold is first primed with auto body primer. Smooth-Cast 300 liquid plastic is measured, mixed, and poured into the mold. After three minutes, the liquid plastic turns to a solid. Let Smooth-Cast 300 cure for 10 minutes at room temperature. Remove the support shell and demold casting. A perfect reproduction! The casting is ready to be painted.
Make It Now! with Smooth-On
https://www.smooth-on.com/
https://www.facebook.com/SmoothOn
https://twitter.com/SmoothOn
https://www.google.com/+smoothon
Permanently restore your headlights like if they were straight out of the factory by wet sanding a spraying a clear coat. Perfect!
Clean your headlights the right way and permanently! Use sandpaper and a good clear coat for that perfect brand new headlight look. Stop using toothpaste, or whatever household materials that hardly make a difference.
New Video at this link: https://www.youtube.com/watch?v=bj4Dq61-hkQ
This video will explain how to make your vehicles headlights clean once again. I used materials that are cheaper than most headlight restoration kits. I used acrylic enamel paint (clear), 400 grit sand paper (you should also use the 1000-1200), and masking tape. All of which were bought at a local auto parts store. The outcome (if done correctly) can prove to be better than some headlight restoration kits. When sanding, wet the headlight and the sand paper. Make sure there is plenty of water. (this is called wet sanding)
The can said wait 15 minutes before a second coat but i should have never listened to the can. It came out prefect the 1st time.
WARNING: THIS IS NOT AN EASY PROCESS. IF YOU MAKE A MISTAKE IT TAKES QUITE A BIT OF WORK TO FIX.
Sorry for the lack of audio. I didn’t correctly cite a song so they took it off. Ill try to find one later. Thanks for watching!