Factory directly provide SV-GT2000 High-speed rail subway silicone sealant to Czech republic Factories
Short Description:
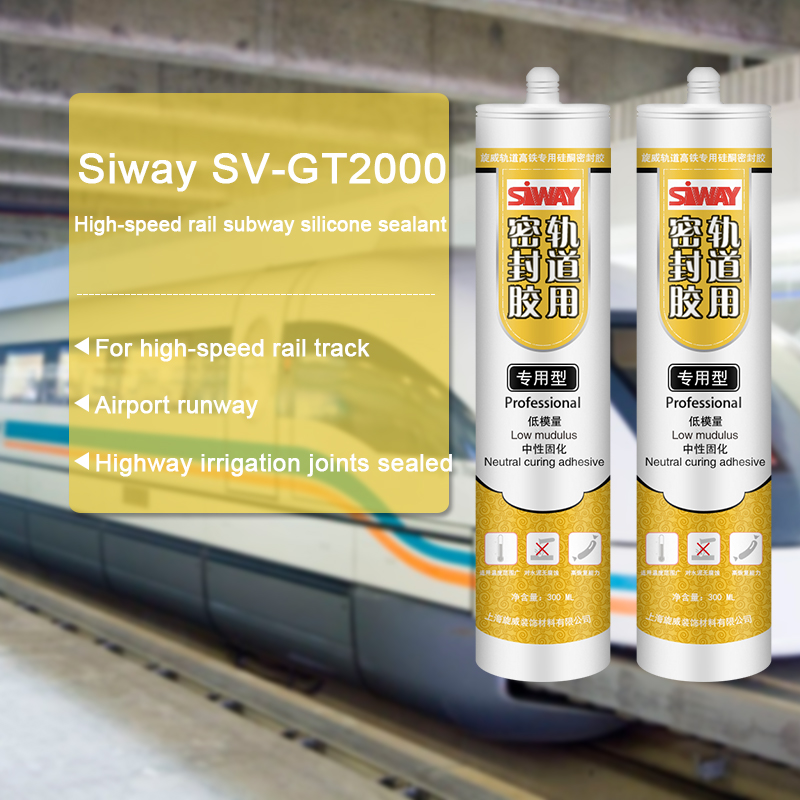
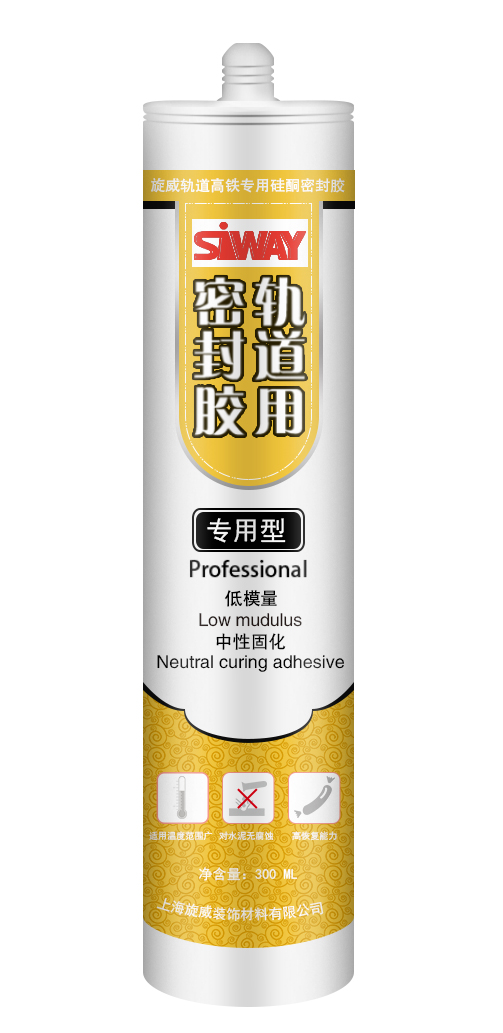
Description SV-GT2000 High-speed rail subway silicone sealant is a one-component, low modulus, neutral curing adhesive. For most of the stone, ceramic and cement components, can produce excellent adhesion Key Features (1) easy to use: can be used at any time out; (2) excellent thixotropy and extrusion, at any temperature (-40 ℃ to 100 ℃) can be extruded; (3) good adhesion, the stone, ceramics and cement components and other building materials with excellent adhesion properties; no poll...
We also offer product sourcing and flight consolidation services. We have our own factory and sourcing office. We can provide you with almost every type of product related to our product range for Factory directly provide SV-GT2000 High-speed rail subway silicone sealant to Czech republic Factories, We sincerely welcome all guests to set up business relationships with us on the basis of mutual benefits. Please contact us now. You will get our professional reply within 8 hours.
Description
SV-GT2000 High-speed rail subway silicone sealant is a one-component, low modulus, neutral curing adhesive. For most of the stone, ceramic and cement components, can produce excellent adhesion
Key Features
(1) easy to use: can be used at any time out;
(2) excellent thixotropy and extrusion, at any temperature (-40 ℃ to 100 ℃) can be extruded;
(3) good adhesion, the stone, ceramics and cement components and other building materials with excellent adhesion properties; no pollution of the porous material;
(4) excellent weather resistance, aging performance, excellent tensile and compression resilience, can carry ± 30% displacement capacity;
(5) neutral curing, stone, cement and other building materials without corrosive, to overcome the shortcomings of acid corrosion material.
(6) base modulus: passive deformation occurs when the role of moderate stress on the concrete substrate to ensure that the concrete surface is not destroyed;
(7) high elasticity high recovery capacity: can be repeated from the seams with the movement, fast response fast response, permanent deformation of small.
Basic Application
1.For high-speed rail track, airport runway, highway irrigation joints sealed, can withstand large displacement;
2.Can also be used for other concrete pavement sealing, subway engineering, tunnels, bridges and other projects sealed.
Technical data sheet
|
Test project |
Unit | value | ||
| surface drying time(25℃,50%R.H.) | min | ≤60 | ||
| Sagging(70℃) | vertical | mm | ≤3 | |
| Horizontal | mm | 0 | ||
| Mass loss rate | / | ≤5% | ||
| Elastic recovery rate | / | ≥80% | ||
| 100% tensile strength | 23℃ | MPa | ≤0.3 | |
| -20℃ | MPa | ≤0.3 | ||
| tensile strength | 23℃ | MPa | ≥1.0 | |
| -20℃ | MPa | ≤2.0 | ||
| 168 h after thermal aging (80 ℃) | MPa | ≥0.8 | ||
| 168 h after alkali treatment | MPa | ≥0.8 | ||
| Breaking elongation | 23℃ | / | ≥800% | |
| -20℃ | / | ≥600% | ||
| 168 h after thermal aging (80 ℃) | / | ≥600% | ||
| 168 h after alkali treatment | / | ≥600% | ||
| Bond strength | 23℃ | / | No damaging | |
| -20℃ | / | No damaging | ||
| 168 h after thermal aging (80 ℃) | / | No damaging | ||
| 96 h after immersion | / | No damaging | ||
Color
Black, White, Gray
Package
300ml in cartridge * 24 per box, 590ml in sausage *20 per box
Shelf life
12 months
Note
If you want the TDS or MSDS or other details, please contact with our sales person.
How to mount a “cement” mount type towel bar (and similar accessories). This uses no screws. I had these sitting in storage for years. Could not find anyone who knew how to install it, got lots of guesses, but no real knowledge/experience. Even American Standard told me they no longer knew! I researched it for a long time before I accidentally came across an old timer that knew how to do this.
MATERIALS
- Grout (matching color)
- End pieces and rod
- Padding for floor
- Support stuff to hold it to wall while it sets (HAVE THIS AT HAND WHEN YOU START!!!)
- Tools: Ceramic cutting wheel for angle grinder, hammer, chisel
PROCESS
- Soak the towel bar ceramic end pieces in water (over night is best)
- Measure carefully the holes to be cut in the wall. Check for level also.
- Cut holes with ceramic saw or similar
- Chisel out the brick or cement wall to a depth about 1cm (quarter inch) deeper than the mount insert (this is the beige protrusion on the end pieces in the video. It varies with style and type of thing being mounted: soap dish, toilet paper holder…)
- Clean / wash the holes of dust, chips and other.
- Wet the holes in the wall (pack with wet rags for an hour or more)
- Cover the floor with something that will prevent the ceramic end pieces from breaking should one fall or be dropped. They shatter like glass.
- “Prime” the surface of the holes with grout ensuring it sticks everywhere (Priming using wet surface rubbed with grout mix. Rubber gloved hands are best).
- Apply grout in the wall holes so the grout will contact the entire surface of the end pieces (it does not squeeze out, so you have to apply, remove grout, add grout, etc. until it’s perfectly filled without voids or overfilled.)
- “Prime” the contacting surfaces (beige in the video) of the end pieces with grout
- Make the final insertion of the first end piece, work into position. If it’s not fitting, take it out, wash it off, clean out the hole and figure out what’s wrong before proceeding.
- Assuming the first end piece fits OK, brace it firmly into position. It is best to let it set overnight, if possible. I had to do both ends at the same time because the bathroom could not be closed down for days.
- Repeat the above for the second hole, but REMEMBER THE TOWEL BAR BEFORE SETTING THE SECOND END PIECE!!! Note: do not let the towel bar move and pry loose the first end piece.
- Brace the second end piece.
- Let set for 24 hours.
- Remove the braces. Tape the end pieces to the wall (put up a “Do Not Use” sign)
- Wait for a week and test to ensure it has stuck. If you can wait a second week before using, that’s what I was told was best. (I tested mine at 40 lbs or 20 kilos each end).
- Ready to use.
NOTES: I got a question: “Can you place these on a sheetrock / gypsum wall with tile?” I have not tried this. As mentioned in the video I saw someone try this a long time ago and it did not work (it fell out). If I had to do it, I would place/glue some cement board strips behind the sheetrock. I’d drill many small holes in the cement board to ensure the cement has something to grab. Again I’ve not done this nor would I be confident it would work, but it would be my best guess.
WARNING
When cutting cement, tile, etc. with angle grinders use eye protection and dust protection! The dust is bad for your lungs. The chips can blind you.