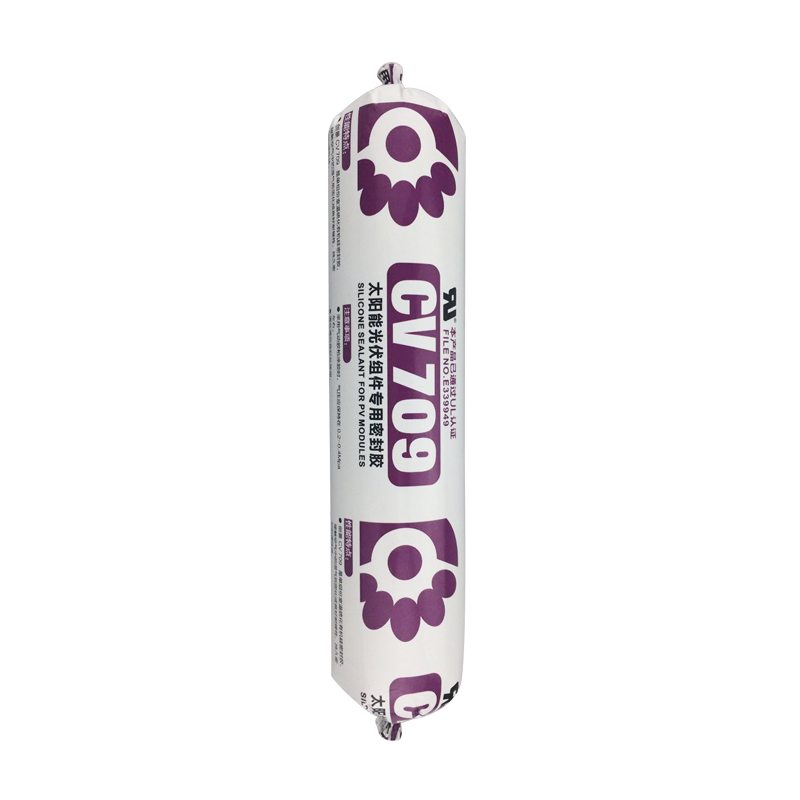
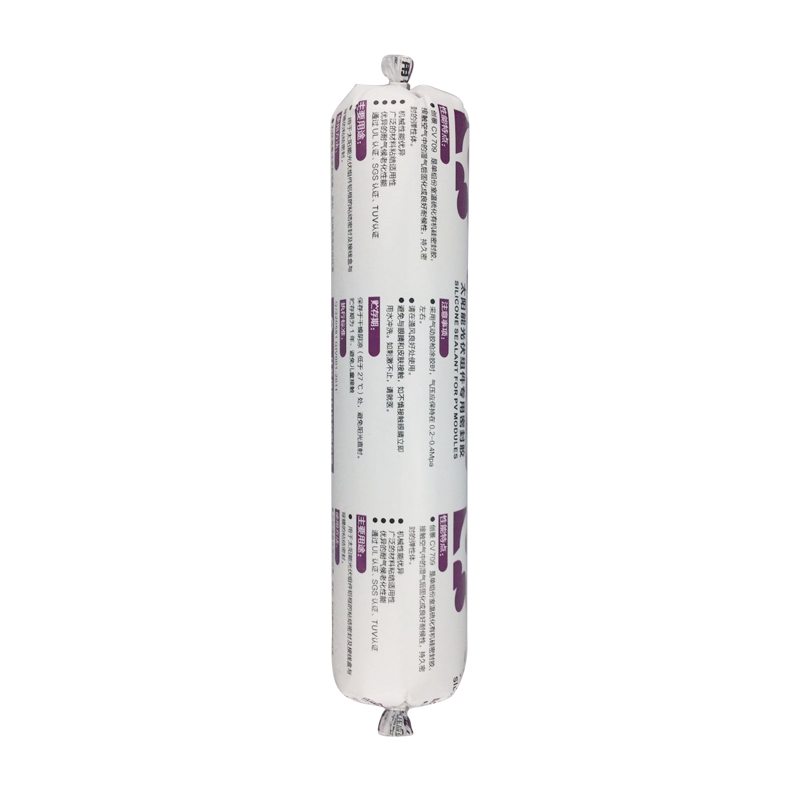
Cheap PriceList for CV-709 silicone sealant for PV moudels for Hungary Factory

Short Description:
Description CV709 is a high-performance silicone sealant, one-component oxime type room temperature curing silicone rubber, has excellent weather resistance, high thixotropy, after curing for solar components involved in the base material has good caking property, by TUV for environmental requirements of the ROHS, UL E339949 Key Features 1. 100% silicone 2. No sag 3. high thixotropy 4. Water & weatherproof 5. For solar components involved in the base material has good bonding Basic Ap...
Our commission is to serve our users and clients with best quality and competitive portable digital products for Cheap PriceList for CV-709 silicone sealant for PV moudels for Hungary Factory, Inspired by the rapid developing market of the fast food and beverage consumables all over the world , We are looking forward to working with partners /clients to make success together .
Description
CV709 is a high-performance silicone sealant, one-component oxime type room temperature curing silicone rubber, has excellent weather resistance, high thixotropy, after curing for solar components involved in the base material has good caking property, by TUV for environmental requirements of the ROHS, UL E339949
Key Features
1. 100% silicone
2. No sag
3. high thixotropy
4. Water & weatherproof
5. For solar components involved in the base material has good bonding
Basic Application
1.Solar module frame seal
2.The adhesive of the solar energy back to the terminal block
3.General industrial assembly with seal
Technical data sheet
| Test standard | Test project | Unit | value |
| Before curing——25℃,50%R.H. | |||
| specific gravity | g/ml | 1.34-1.40 | |
| GB13477 | Operating time | min | 15 |
| GB13477 | surface drying time(25℃,50%R.H.) | min | 40-60 |
| 3 days after curing——25℃,50%R.H. | |||
| Temperature range | ℃ | -55~200 | |
| GB13477 | Durometer Hardness | Shore A | 40~55 |
| The ultimate tensile strength | Mpa | ≥2 | |
| GB13477 | Breaking elongation | % | 300-600 |
| Aluminum bonding shear strength | Mpa | ≥1.5 | |
| Electrical properties | |||
| Breakdown voltage | Kv/mm | ≥20 | |
| Volume resistance | ohm.cm | 9E+14 | |
| Dielectric constant | 3.1@50Hz | ||
Certification
UL E339949; TUV
Color
Black, White
Package
300ml in cartridge * 24 per box, 500ml in sausage *20 per box
Shelf life
12 months
Note
If you want the TDS or MSDS or other details, please contact with our sales person.
Silicone molding, also known as room temperature vulcanization (RTV) molding, is an affordable solution for prototyping, functional testing, product demonstrations and short–run production. The molds are made by pouring liquid silicone rubber over a pattern; the resulting firm but flexible mold can reproduce extremely complex geometries and intricate details with tight tolerances.
The traditional mold making approach is to machine the patterns, but this can prove costly, require lead times of one to two weeks, and restricts the geometric complexity of the molded parts. Design changes to machined parts require substantial lead times.
Stratasys additive manufacturing is a more cost-effective and efficient solution for silicone molding — reducing time, labor and cost. The 3D printing process also enables you to easily produce a prototype pattern for customer review, with a typical lead time of less than 24 hours. For more on silicone molding with 3D printed patterns: https://ow.ly/yEGot
In this video you will learn the step by step process of creating silicone mold patterns using PolyJet based 3D printing from Stratasys.
For more information about Stratasys 3D Printers: https://ow.ly/yEH0T
If you cannot drain your aquarium to repair a leak from the inside, and you need to work from the outside, you have to beat hydraulic pressure.
The way you can do it, is by patching from bottom (where your leak is) to top.
1) Use a 2″ tape (scotch / masking / duct / whatever). See the patch in my other video: https://www.youtube.com/watch?v=3HRAjfYTesQ
2) patch this tape with a coat or 2 of a plastic bag.
3) put a stripe of silicone (any kind – since it’s external). Now your “bandaid” is ready.
4) put this patch on your Leakage in a way that the dripping is chased up. You cannot completely seal since hydraulic pressure is stronger than silicone. But the silicone is strong enough to push the water flow 1″-2″ up. Just make sure you chase the leak Upwards – not downwards, and not side ways.
5) every 20 minutes or so, you can take of your patch (the plastic bag helps here), and put a new patch, 2″ higher up (repeat steps 1-4) with a small overlap between the previous and the new silicone, so that you continue chasing upwards. If you miss (leak goes in another direction, repeat on this section, till you get it up).
6) as you go upwards, at some point the hydraulic pressure will be low enough that your leakage stops completely. even if you are not lucky, once you reach the top water level, the water pressure is 0, and your leakage will be over.
My leak was at the bottom front left side, and I had to work up slowly against 15″ of water (about 40cm on a 50cm deep aquarium).
When I started this, I did’t know how it was going to turn out. In hindsight I would of course drain 1/3 of the water or 1/5 of the water – anything that is doable without taking out the fish (my initial constraint) or impacting the bio-equilibrium. Doing this would reduce pressure and essentially make it easier (it would take less stages of 2″ patching).
As a conclusion, I can say that in any case drain your aquarium as much as you can – it will help.
Then, if your leak is situated above the water level – work from the inside, using aquarium safe silicone, and if your leak is below that, use the method in this video.
As this was my first external repair it doesn’t look nice, and possibly I could have tried with less silicone, or maybe I could have trimmed it afterwards. However right now I cannot afford the headace of causing a new leak just for the sake of aesthetics.