27 Years Factory SV-800 General purpose MS sealant Export to Mauritius

Short Description:
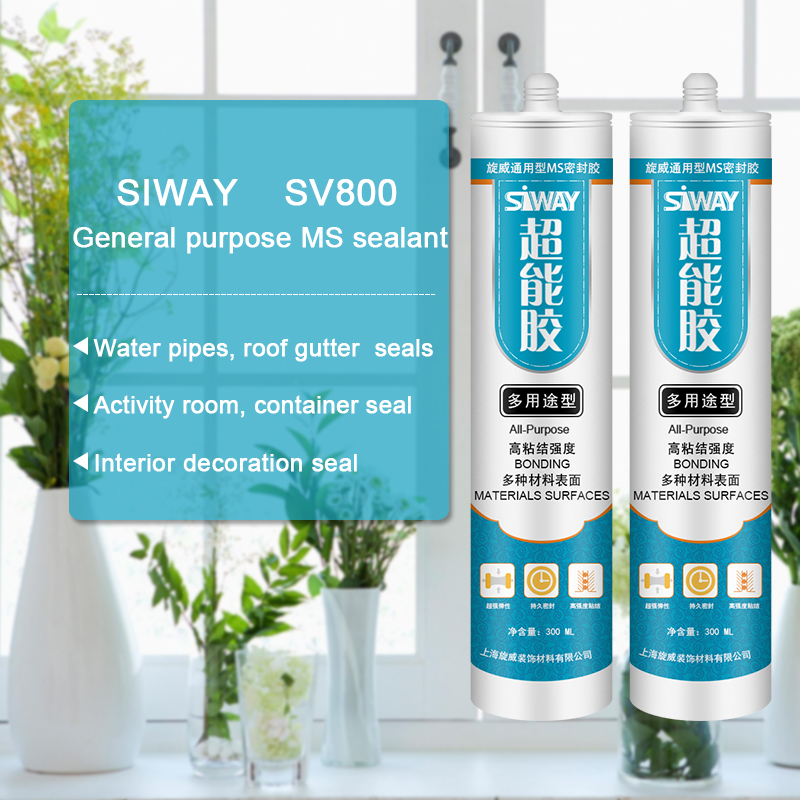
Description General purpose and low modulus MSALL sealant is a high quality, single component, paintable, anti-polluting neutral modified sealant based on silane-modified polyether polymers. The product does not contain solvents, no pollution to the environment, while most of the building materials, without primer, can produce superior adhesion. Product Features 〔1〕 environmental protection products: no solvent, no PVC, no isocyanate, non-toxic, tasteless, non-polluting, fast curing;...
As for competitive prices, we believe that you will be searching far and wide for anything that can beat us. We can state with absolute certainty that for such quality at such prices we are the lowest around for 27 Years Factory SV-800 General purpose MS sealant Export to Mauritius, We welcome new and old customers from all walks of life to contact us for future business relationships and mutual success!
Description
General purpose and low modulus MSALL sealant is a high quality, single component, paintable, anti-polluting neutral modified sealant based on silane-modified polyether polymers. The product does not contain solvents, no pollution to the environment, while most of the building materials, without primer, can produce superior adhesion.
Product Features
〔1〕 environmental protection products: no solvent, no PVC, no isocyanate, non-toxic, tasteless, non-polluting, fast curing;
[2] surface coating: compatible with most industrial paint, dry surface can be painted, so does not affect the curing speed;
[3] easy to use: excellent thixotropy and extrusion, for a wide temperature range.
〔4〕 good adhesion: the stone, aluminum, ceramics and cement components, and most of the building materials with excellent adhesion properties; no pollution of the porous material.
[5] excellent weather resistance, aging performance, superior tensile and compression resilience;
[6] neutral curing, stone, cement and other non-corrosive building materials, to overcome the common silicone rubber easy to contaminate the shortcomings of the substrate.
Basic use
General purpose and low modulus MSALL sealant Suitable for use:
[1] construction of housing and other areas of bonding and sealing;
[2] fixed panel, frame, window sill installation, suitable for a variety of building materials such as paint metal, glass, wood, concrete, stone, masonry and other ordinary seal;
[3] seam and ceiling seal;
[4] water pipes, roof gutter and other seals;
[5] activity room, container seal;
[6] interior decoration seal;
[7] mildew – suitable for kitchen and toilet applications;
〔8〕 the floor system of bonding, especially for housing renovation when the laying of tiles;
[9] on the porous material or smooth, moist surface has a strong adhesive force.
[10] Please note: MSALL sealant is not suitable for glass inlay use; for the prefabricated concrete displacement joint seal recommended supporting the use of Jiang special primer.
Technical data sheet
Color
White, black, grey
Package
300ml plastic cartridges
Shelf life
12 months
Note
If you want the TDS or MSDS or other details, please contact with our sales person.
Table of Contents:
0:00 – 1:40 : Removing carpet stuff from floor
1:40 – 6:00 : Attaching your subfloor RIGHT, and marking your joists
6:16 – 7:51 : Applying Primer
7:51 – 8:24 : Filling cracks/holes
8:24 – 11:09 : Applying self-leveler
11:09 – 18:29 : Making tiles out of slabs
18:29 – 24:57 : pushing one tile into place
24:58 – 27:29 : doing some orbital sanding
27:29 – 29:16 : beware of the sealer coat!
29:16 – 30:12 : doing some inter-coat screening
30:12 – 31:34 : routing a floor duct
31:34 – end: review of finished product as I, non-expert, installed it.
This is a mediocre walkthrough but it should give you a good idea of how the process goes.
Note: this won’t work in all mobile homes. A while back, mobile homes had very little oversight in their creation, so manufacturers were more free to do as they pleased. Typically though not always, this lead to lower quality construction which *might not support the additional 6+ lbs per square foot to the flooring system!
Anyways
You’ll want to look up some more info about using a T-Bar to apply hardwood flooring coating products, as well as information about sanding/refinishing a hardwood floor.
If you have anything you’d like me to add or link you to, then please let me know what I can do.
Tools required for the job:
2x sawhorses (free)
item-moving ‘dolly’ (20 bucks)
gloves to protect hands from repeated abuse (2 bucks)
2x smooth faced hammers (cheap)
marshalltown concrete form pry bar for pushing slabs against wall studs (60 bucks used amazon)
about 2 quarts of wood filler putty. Recommended to check out: latex wood floor filler ( try ebay) (~30 bucks)
7 gallons of oil based polyurethane floor coating (USD ~250 in california)
2x skillsaws (one free other 25 bucks) w 2x carbide blades (~30 bucks)
Good router: 235 dollars! ![]()
Tongue & Groove bits (30 bucks ebay)
2.5″ flush trim router bit (17 bucks ebay – not found in Blowes)
2x clamps ~$10
aluminum angle stuff for router guide/straight lines (freeish)
Mechanical carpenter’s pencil: 3 bucks
Chalk line w/chalk: 25 cents @ discount isle of hardware store. Since raised to 5 bucks
2x 12″ framing squares (7.00×2 @ home depot)
drywall square (11.00 @ home depot)
razor for scraping off stuff ($1 @ garage sale)
plastic shims for holding floorboards in place temparily (borrowed : free)
17 point 3 inch galvanized screws x ~10 lbs. ~20 bucks ebay.
17 point 5 inch galvanized screws x ~1 lb ~2 bucks ebay
tape measure: $2 @ walgreens
Jigsaw: borrowed
Superglue x10 bottles: $4 @ harbor freight
Underlayment: $.25-.5 per square foot. Possibly unnecessary, but it really did seem to help with impact noise.
Impact driver: $75-250, depending on how nice you want it.
drill or chuck for impact driver: $15+.
Aluminum straight edge (~8ft) for checking floor levels: free on craigslist. sorry. good luck with that.
Mixing attachment for masonry (~10 @ hardware store?, $1@ garage sale)
Self leveling concrete ($28-33/ 50 lb bag) (I used 9 bags FOCCKK!)
Drum sander rental: 60/day + sandpaper (40-140 bucks)
Orbital sander rental: 50/day + sandpaper (20-80 bucks)
5 gallons primer: free on craigslist
Orbital polishing thingy + clamp + 150 grit screen: 25 + 1 + 5 (garage sale x2, big box store)
Steps:
Remove existing floorcovering (depends what you have)
Attach subfloor using REAL fasteners like screws or ring shank nails in order to mitigate squeaks
Mark where your floor joists and vents are on the wall. Mark at a height slightly higher than your slabs will be.
Seal up any holes or gaps in the floor
make the floor essentially waterproof and sterile using cleaning agents + sealer/primer.
mark where the low spots on the floor are.
Apply a material which will fill those low spots (IE self leveling concrete)
cut your slabs and load them into your rooms. after each room is laid out, smush the tiles in as close as you can, countersink your screw holes @ locations above the joists, and screw the slabs down into your joists. Move onto the next rooms until your entire floor areas are covered.
Rent a drum sander & sand the floors along the grain of the wood. If you’ve got heavy scratches in some areas, you’ll have to star with a pretty low grit. Always work your way up to 80-120 grit.
Rent an orbital sander and orbit your whole floor. First attack your edges where paint still remains, then go over the whole floor, making sure to get rid of any sanding marks (but hey, if you got sanding marks, you can call it “character”)
Apply polyurethane floor coating.
Let it cure for the time on the back of the can (usually like 2 weeks) and move back into your house!


