18 Years manufacturer SV-618 Acetic Glass Sealant for India Importers
Short Description:
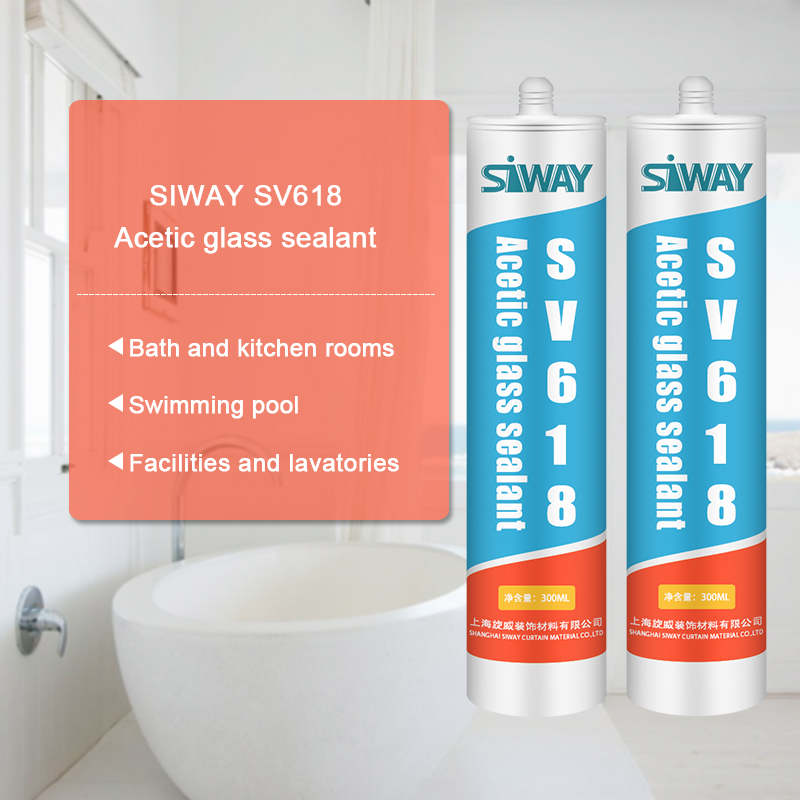
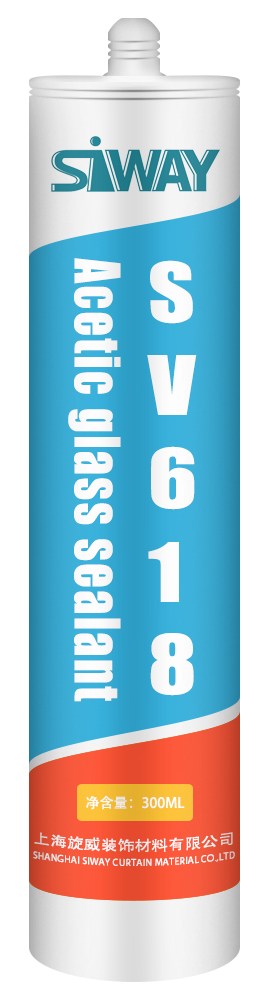
Description It is one-component acetoxy silicone sealant with fungicide to form a durable and flexible rubber seal resistant to water, mildew and mold. Where to use SV-618 is an excellent candidate to consider the reliable prevention of mildew formation around fixtures in high humidity and temperature areas such as bath and kitchen rooms, swimming pool, facilities and lavatories. It also has good adhesion to most common building materials e.g. glass, tiles, ceramics and fiber glass, painte...
Bear "Customer first, Quality first" in mind, we work closely with our customers and provide them with efficient and professional services for 18 Years manufacturer SV-618 Acetic Glass Sealant for India Importers, items won certifications with the regional and international primary authorities. For far more detailed information, please contact us!
Description
It is one-component acetoxy silicone sealant with fungicide to form a durable and flexible rubber seal resistant to water, mildew and mold.
Where to use
SV-618 is an excellent candidate to consider the reliable prevention of mildew formation around fixtures in high humidity and temperature areas such as bath and kitchen rooms, swimming pool, facilities and lavatories. It also has good adhesion to most common building materials e.g. glass, tiles, ceramics and fiber glass, painted wood.
Key Features
1. 100% silicone
2. Easy to apply
3. Highly efficient and safe bactericide
4. Low VOC
5. Proven Performer
Technical data sheet
Technical data sheet for reference,
Certification
JC/T885-2001 20LM; and GB/T1741-2007 Mildew Proofing Grade 0
Color
clear, black, silver gray, white
Package
300ml in cartridge * 24 per box
Shelf life
12 months
Note
If you want the TDS or MSDS or other details, please contact with our sales person.
If your Toyota 4×4 is leaking fluid from the rear flange/driveshaft on the back of the transfer case, here is most likely the problem and how I fixed it for $10.
✿ ✿ ✿ ✿ ✿ ✿ READ ME ✿ ✿ ✿ ✿ ✿ ✿
✿Please respect my work and use my tutorials to recreate pieces for yourself, not to sell as your own design. If you share your recreations on social media, credit me using #maiveferrando, adding my name and a link to my Youtube video and/or channel.
————————————————————————————————————-
Hi everyone!
In this video I’ll be sculpting a tree using polymer clay directly onto a wooden frame. I’ve never done this before so it is more of an experimental type video to see how the frame behaves in the oven and to test whether I enjoy the process or not.
I baked the tree on the frame 3 times at 110ºC (more info on baking below) and at no point did I see any damage caused to the frame apart from one of the inner corners (shown in video) which separated very slightly pulling away some clay with it. It was very easily fixed and it did not alter the look or overall strength of the frame.
There was some minor shrinkage, but it was almost not noticeable. In fact I am not a 100% sure.
As for my design, I kept it extremely simple. My original idea had a tree going all around the left side of the frame (like a 3D tree, instead of flat) but I decided to keep it simple just in case something went wrong and had to scrap it. Of course, I would like to make more in the future, maybe even make my own frames out of lolly sticks, (seeing as real wood frames are not that easy to find) but to make picture frames instead.
I really hope you found this useful and that is had inspired you to make your own!
✿If you’re new to my channel make sure you subscribe for more videos every week and if you liked this video, why not give it a thumbs up and share the love?
Have a request for upcoming tutorials? Let me know in the comments!
BUY MY PIECES HERE:
✿ Etsy: https://www.etsy.com/uk/shop/GlossyAppleDesigns?ref=hdr
FOLLOW ME!
✿ Second Channel: https://www.youtube.com/channel/UCpgSKm_hj6emUN9sMuv6Y_A
✿ Instagram: https://www.instagram.com/maiveferrando/
✿ Facebook: https://www.facebook.com/glossyapple
✿ Twitter: https://twitter.com/MaiveFerrando
Materials:
✿ Wooden Frame: https://go.magik.ly/ml/4q0e/
✿ FIMO Professional in Champagne: https://go.magik.ly/ml/4q07/
✿ Premo in White: https://go.magik.ly/ml/4q08/
✿ Pale Yellow Colour mixed by me.
✿ FIMO Liquid: https://go.magik.ly/ml/451m/
OR Translucent Liquid Sculpey: https://go.magik.ly/ml/451p/
OR Sculpey Bake & Bond: https://go.magik.ly/ml/451q/
✿ DecoArt Gloss Varnish: https://go.magik.ly/ml/4q0b/
✿ DecoArt Matte Varnish: https://go.magik.ly/ml/4q09/
(Note: I used this one, but I don’t think it’s very matte. More like a semi-gloss finish).
✿ Acrylic Paints: https://go.magik.ly/ml/451r/
✿ FIMO Blades: https://go.magik.ly/ml/451s/
✿ Needle Tool: https://go.magik.ly/ml/451y/
OR Watch my DIY Needle tool tutorial below!
DIY Needle Tool Tutorial: https://www.youtube.com/watch?v=py45AR6TUvY
✿ Nail Art Dotting Tools: https://go.magik.ly/ml/451u/
✿ Nail Art Brushes: https://go.magik.ly/ml/451v/
✿ Metal Sculpting Tools: https://go.magik.ly/ml/451w/
✿ Silicone Sculpting Tools: https://go.magik.ly/ml/451x/
OR Watch my DIY Silicone Tools below to make your own!:
DIY Silicone Tool Tutorial: https://www.youtube.com/watch?v=lSk0DFva6C4&t=1s
✿ I also used a crochet hook, but you can used a toothpick, manicure stick or skewer if you don’t have sculpting tools of any kind.
DISCLAIMER: I can’t guarantee that my techniques and the materials I use will suit everyone. I can only share with you what I know based on my experience.
⚠ Products and materials are examples and suggestions. Do read the item’s description before buying.
✿ BAKING TIPS:
I placed the frame in the oven first and then turned the oven on. (This is so that they both warm up together and to minimize the chances of frame suffering any damage caused by sudden contrasts in temperature.)
Allow the oven to warm up to 110ºC and once it reaches this temperature, set your timer.
I baked the frame/tree twice for 15 minutes and the third time for 20 minutes (you can do longer if you want, but keep the temperature at 110ºC or constant anywhere below 130º).
Whatever temperature do not exceed 130ºC! Or it will burn.
How many times you bake your progress depends on how much work you are able to do without ruining what you’ve already sculpted. I am quite clumsy, so I try to avoid accidents by baking my pieces several times.
Always read the baking instructions for your particular brand of polymer clay, as temperatures and times may vary slightly.
Music: “Perspectives” by Kevin MacLeod is licensed under a Creative Commons Attribution licence (https://creativecommons.org/licenses/by/4.0/)
Source: https://incompetech.com/music/royalty-free/index.html?isrc=USUAN1100341
Artist: https://incompetech.com/