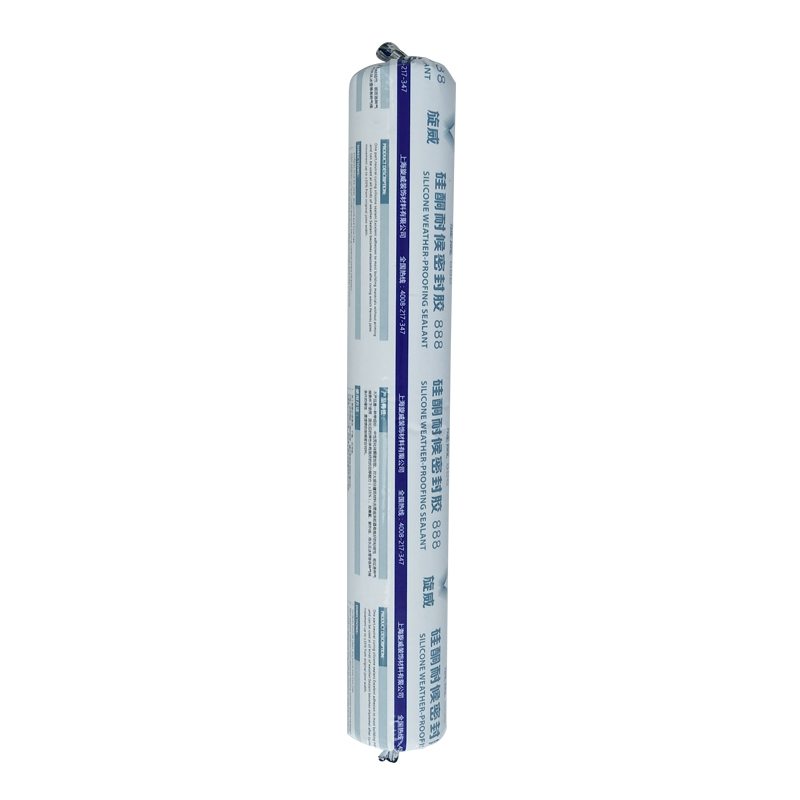
18 Years Factory offer SV-888 Weatherproof Silicone Sealant for Muscat Factory


Short Description:
Description SV-888 silicone weatherproof sealant is one component, neutral cure silicone sealant, designed for glass curtain wall, aluminum curtain wall and building exterior design, has excellent weathering properties, it can form durable and most building materials, waterproof and flexible interface. Key Features 1. 100% silicone 2. Medium modulus (25% movement capability) 3. UV resistance & weatherproof 4. Primerless adhesion to most building materials Basic Application 1.All ...
Our company since its inception, always regards product quality as enterprise life, continuously improve production technology, improve product quality and continuously strengthen enterprise total quality management, in strict accordance with the national standard ISO 9001:2000 for 18 Years Factory offer SV-888 Weatherproof Silicone Sealant for Muscat Factory, Welcome to build the well and long standing business relationships with our company to create a glorious future together .customers' satisfaction is our eternal pursuit
Description
SV-888 silicone weatherproof sealant is one component, neutral cure silicone sealant, designed for glass curtain wall, aluminum curtain wall and building exterior design, has excellent weathering properties, it can form durable and most building materials, waterproof and flexible interface.
Key Features
1. 100% silicone
2. Medium modulus (25% movement capability)
3. UV resistance & weatherproof
4. Primerless adhesion to most building materials
Basic Application
1.All kinds of glass curtain wall weatherproof seal
2.For metal (aluminum) curtain wall, enamel curtain wall weatherproof seal
3.Joint sealing of concrete and metal
4.Roof joint seal
Technical data sheet
| Test standard | Test project | Unit | value |
| Before curing——25℃,50%R.H. | |||
| GB13477 | Flow, sagging or vertical flow | mm | 0 |
| GB13477 | Operating time | min | 10 |
| GB13477 | surface drying time(25℃,50%R.H.) | min | 20 |
| Deep curing | mm/day | 1-2 | |
| Sealant curing speed and operating time will have different with different temperatures and temperature, high temperature and high humidity can make sealant curing speed faster, rather low temperature and low humidity are slower.21 days after curing——25℃,50%R.H. | |||
| GB13477 | Durometer Hardness | Shore A | 28 |
| GB13477 | The ultimate tensile strength | Mpa | 0.65 |
| Temperature stability | ℃ | -50~+150 | |
| GB13477 | Movement capability | % | 25 |
Certification
GB/T 22083-G-35;ASTM C920
Color
Black, white, grey
Package
300ml in cartridge * 24 per box, 590ml in sausage *20 per box
Shelf life
12 months
Note
If you want the TDS or MSDS or other details, please contact with our sales person.
Making a Cavity Pour Mold with Mold Max 30 RTV Silicone Rubber from Smooth-On.
Our model is a hand-carved hard wood 3-dimensional figure. Drill an air release hole in to the middle of a baseboard. Secure model to baseboard with screws. Apply plastic wrap to the original model to protect the surface. Cover the model with 1/2-inch (1.3 cm) clay blanket. Create a 2-inch (5.1 cm) flange for registration. Build a 3-inch (7.6 cm) clay dividing wall and apply clay supports. Drill indentations in the baseboard to register shell. Build a clay pour spout and a 1/2-inch clay dam. Apply Sonite Wax to baseboard and then apply Ease Release 200 to the entire surface.
Measure and mix duoMatrix NEO with a mix ratio of 2A:1B. Combine parts and mix thoroughly. For the first layer, apply a detail coat to the first half. Measure and mix duoMatrix NEO with chopped fiber. Apply this as the second layer. Apply a third layer of duoMatrix NEO without chopped fiber. A wood support leg is attached using duoMatrix NEO. Let cure for one hour.
Once the NEO has cured, remove the dividing wall. Drill indentations into shell for registration. Build a clay dam and pour spout. Apply Sonite Wax to baseboard and exposed shell and then apply Ease Release 200 to the entire surface. Measure and mix NEO for the second half of the support shell, following the same procedure used to create the first half. Again, a wood support leg is attached using NEO and the shell is allowed to cure one hour at room temperature. A rasp is used to create a smooth flange edge, and then three holes are drilled through the support shell. Bolts will help secure the support shell during casting.
Demold the support shell halves, remove the plastic wrap from the model, and then remove clay from the support shell. Create vent holes in support shell to allow air to escape. A 1/4-inch (6 mm) drill bit is used to drill holes through the support shell for a total of six air vents. Apply release agent to both the model and support shell. Register the support shell over the model and secure. Use bolts to hold the support shell halves together. Drywall screws are used to secure the support shell to the baseboard. Seal all seams with a hot glue gun. Place drinking straws into pre-drilled holes for air release, using clay to help secure and seal the straw. Only 1/4-inch of the straw will go into the support shell. IMPORTANT: Do not allow the drinking straws to touch the model. Trim the top two straws for easier access to the pour spout.
Measure and mix Mold Max 30 silicone rubber. Then vacuum the Mold Max 30. After vacuuming, pour Mold Max 30 into the pour spout. Cap the top of the straws with clay to stop the flow of rubber, saving material. Continue to pour rubber until the cavity is filled. Let Mold Max 30 rubber cure for 16 hours at room temperature. Once cured, remove the support shell and rubber mold from the model. Perfect detail is captured from the original model.
How to cast into the mold:
The mold is first primed with auto body primer. Smooth-Cast 300 liquid plastic is measured, mixed, and poured into the mold. After three minutes, the liquid plastic turns to a solid. Let Smooth-Cast 300 cure for 10 minutes at room temperature. Remove the support shell and demold casting. A perfect reproduction! The casting is ready to be painted.
Make It Now! with Smooth-On
https://www.smooth-on.com/
https://www.facebook.com/SmoothOn
https://twitter.com/SmoothOn
https://www.google.com/+smoothon
Sometime during the last couple weeks of our winter snowbird travels the Keystone Cougar’s built in black tank flushing system gave up the ghost. I hook up the hose to the sewer flush inlet connection, turn on the water, and nothing happens. Something must be plugged.
I tried a thorough cleaning of the back tank using several different treatment chemicals. I also picked up a through the toilet type flushing wand. No luck, the built in tank flush was still broken. It was time to get a bit dirty and take apart the system and see what the problem was.
My system is called a No Fuss Flush. I was able to find a diagram for it online. After perusing the No Fuss Flush diagram, the fault looked to be one of three things. A clogged plumbing pipe, a defective or plugged check valve or a stopped up flushing nozzle.
I found the check valve located under our bathroom sink and could see the water was reaching it. Next, I unscrewed the valve and took it to a tap to test it out. Everything appeared to be in working order. The valve mechanics functioned as they should, and it passed water.
So, it seemed the likely culprit was the flusher’s output nozzle mounted inside the tank. I followed the plumbing pipe into an area of the underbelly on the passenger side of the trailer. After cutting a small access flap into the corrugated plastic, I finally found the nozzle. It’s mounted on the black waste tank with three screws and a large glob of silicone sealant.
Once I removed the nozzle, the problem was obvious. All the nozzle spray holes were plugged up with hardened dark deposits of who knows what. I let the nozzle soak for a while in some hot soapy water and was able to clean it up. Next, I reamed out each hole with a 1/16 bit to make sure they were entirely clear.
I then removed all the old silicone and reinstalled the nozzle with new 3M clear marine grade silicone. Once everything was dry, and the silicone hardened I gave the tank flusher a test. Woohoo! I was back in business.
RV Products I use and recommend – https://www.loveyourrv.com/love-rv-recommended-products-page/
———————————–
Follow our RVing adventures at https://www.loveyourrv.com and https://rvhappyhour.com
Connect with Love Your RV!
Pinterest ► https://www.pinterest.com/loveyourrv
Google+ ► https://plus.google.com/+LoveYourRVonGPLUS
Facebook ► https://www.facebook.com/LoveYourRV
Twitter ► https://twitter.com/loveyourrv
Blog Feed ► https://feeds.feedburner.com/LoveYourRV
Monthly Newsletter ► https://www.loveyourrv.com/mailing-list-sign-up/
Don’t forget to Subscribe! ► https://www.youtube.com/subscription_center?add_user=LoveYourRV