11 Years manufacturer SV-618 Acetic Glass Sealant to Serbia Manufacturer
Short Description:
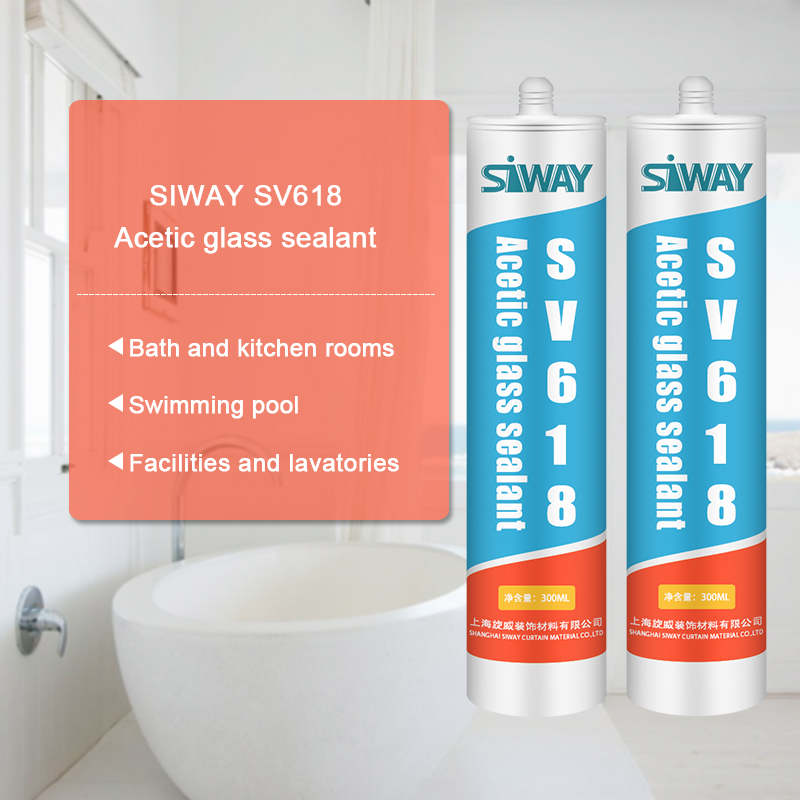
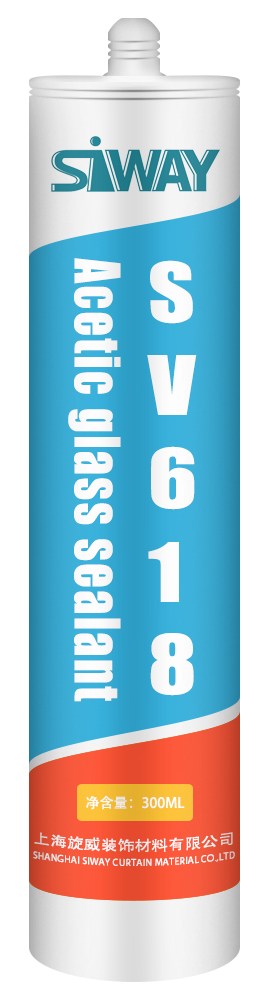
Description It is one-component acetoxy silicone sealant with fungicide to form a durable and flexible rubber seal resistant to water, mildew and mold. Where to use SV-618 is an excellent candidate to consider the reliable prevention of mildew formation around fixtures in high humidity and temperature areas such as bath and kitchen rooms, swimming pool, facilities and lavatories. It also has good adhesion to most common building materials e.g. glass, tiles, ceramics and fiber glass, painte...
Our target is to consolidate and improve the quality and service of existing products, meanwhile constantly develop new products to meet different customers' demands for 11 Years manufacturer SV-618 Acetic Glass Sealant to Serbia Manufacturer, Welcome any inquiry to our company. We will be glad to establish friendly business relationships with you!
Description
It is one-component acetoxy silicone sealant with fungicide to form a durable and flexible rubber seal resistant to water, mildew and mold.
Where to use
SV-618 is an excellent candidate to consider the reliable prevention of mildew formation around fixtures in high humidity and temperature areas such as bath and kitchen rooms, swimming pool, facilities and lavatories. It also has good adhesion to most common building materials e.g. glass, tiles, ceramics and fiber glass, painted wood.
Key Features
1. 100% silicone
2. Easy to apply
3. Highly efficient and safe bactericide
4. Low VOC
5. Proven Performer
Technical data sheet
Technical data sheet for reference,
| Test standard | 1000 | |
| Appearance | ISO 11600 | Have no grain, no agglomerations |
| Extrudability,g/ml | ISO 8394 | 450 |
| Tack Free Time,min | ASTM C 679 | 20 |
| Density,g/cm3 | ISO 1183 | 1.0 |
| Slump,mm | ISO 7390 | 0 |
| Heat weight loss,% | ISO 10563 | 7 |
| Ultimate Tensile Strength,MPa | ISO 8339 | 0.4 |
| Ultimate Elongation,% | ISO 8339 | 150 |
| Ultimate Shear Strength, MPa | ISO 4587 | N/A |
Certification
JC/T885-2001 20LM; and GB/T1741-2007 Mildew Proofing Grade 0
Color
clear, black, silver gray, white
Package
300ml in cartridge * 24 per box
Shelf life
12 months
Note
If you want the TDS or MSDS or other details, please contact with our sales person.
Here are 7 ways to convert ordinary popsicle sticks into exploding throwing stars, that burst into pieces on contact with walls, cupboards, and refrigerators.
Some quick links to a few of the materials I used:
[✓] Colored popsicle sticks: https://amzn.to/2cR3Ebz
[✓] Jumbo colored craft sticks: https://amzn.to/2cRaCkT
Endcard Links:
Projects: https://bit.ly/PLWeekendProjects
Experiments: https://bit.ly/PLExperiments
Life Hacks: https://bit.ly/PLLifeHacks
Mad Science: https://bit.ly/PLMadScience
Next Video: How To Make An N64 Rocket Launch Controller: https://goo.gl/AnNBG2
Previous Video: How To Make Balloons, That Explode: https://goo.gl/YRDwGo
See What Else I’m Up To:
Instagram: https://goo.gl/C0Q1YU
Facebook: https://bit.ly/FBTheKingOfRandom
Pinterest: https://bit.ly/pingrant
Business Inquiries: For sponsorship requests or business opportunities please contact me directly: https://www.youtube.com/thekingofrandom/about
WARNING:
This video is only for entertainment purposes. If you rely on the information portrayed in this video, you assume responsibility for the results of your actions. Have fun, but always think ahead, and remember that every project you try is at YOUR OWN RISK.
Music By:
Scott & Brendo “Photographs” – Instrumental
Check out their music on iTunes: https://bit.ly/ScottBrendoiTunes
See their YouTube page: https://bit.ly/YTScottDW
Project Inspired By:
Childhood memories, and recently making these with my kids. I had a lot of fun with these as a kid, and I wanted to make a video tutorial with loads of different shapes and sizes you may not have seen before.
Project History & More Info:
There isn’t anything dangerous, epic or mind-blowing in this project, and it’s geared mainly for ages 8 and under, which none of you are, but this still took a lot of work to make, and I produced it because my 3 small boys and I had fun making these throwing stars, and I wanted to make a formal tutorial for other parents who might be looking for a crafty activity to do with their family.
I remember learning how to make some popsicle stick bombs in my early years, but can’t exactly remember where or how. Probably some random kid showed me at school, but I never forgot how to make them.
At the time, it seemed really cool to be able to create a “throwing star” that would explode when it hit the wall, and now that my kids are a little bit older but still young enough to enjoy popsicle sticks), I thought this might be a great project to try with them.
I got a couple of bags of craft sticks and scoured the internet for different kinds of throwing stars or stick bombs that we could make. We ended up making 8 different kinds of stick bombs, which you’ll see how to make in a future video.
I’ve had hundreds of messages and comments asking for easy projects with simple materials, and this is about as simple as I can make it, however, I expect most of my viewers won’t like it because it’s a project geared toward a really young audience.
But if you’re a dad, your kids are going to love it .. so go have some daddy time, and make a bunch of exploding stick bombs!
How to make your own texture plate for the big shot.. To make the texture plate use the backing of the the DSP, cut out the shape that you want with the big shot die or punch from the DSP backing card board, glue 2 layer together and then glue on top of a 6 x 8 piece of the card board (backing from the designer paper). I use the backing card board that the Stampin’Up designer paper come with. Your platform tab 1 down, clear cutting pad, 2 layer of the card board from the DSP, your homemade texture template, card stock that you wish to emboss/texture, rubber (silicone), clear cutting pad and then roll it.