OEM/ODM Supplier for SV-666 Neutral silicone sealant for Kenya Factories

Short Description:
Description SV-666 neutral silicone sealant is a neutral curing glue single component, the modulus of the. It is specially designed for windows and doors caulking sealing general plastic doors and windows. It has good adhesion to glass and aluminum alloy, and has no corrosion. Where to use It is fit for multiple purpose sealing and bonding applications to form a silicone rubber adhering to adjacent substrates e.g. glass, ceramic, tile, wood and metal. Key Features 1. 100% silicone 2. Eas...
"Quality first, Honesty as base, Sincere service and mutual profit" is our idea, in order to develop continuously and pursue the excellence for OEM/ODM Supplier for SV-666 Neutral silicone sealant for Kenya Factories, If you are interested in any of our products or would like to discuss a customized order, please feel free to contact us.
Description
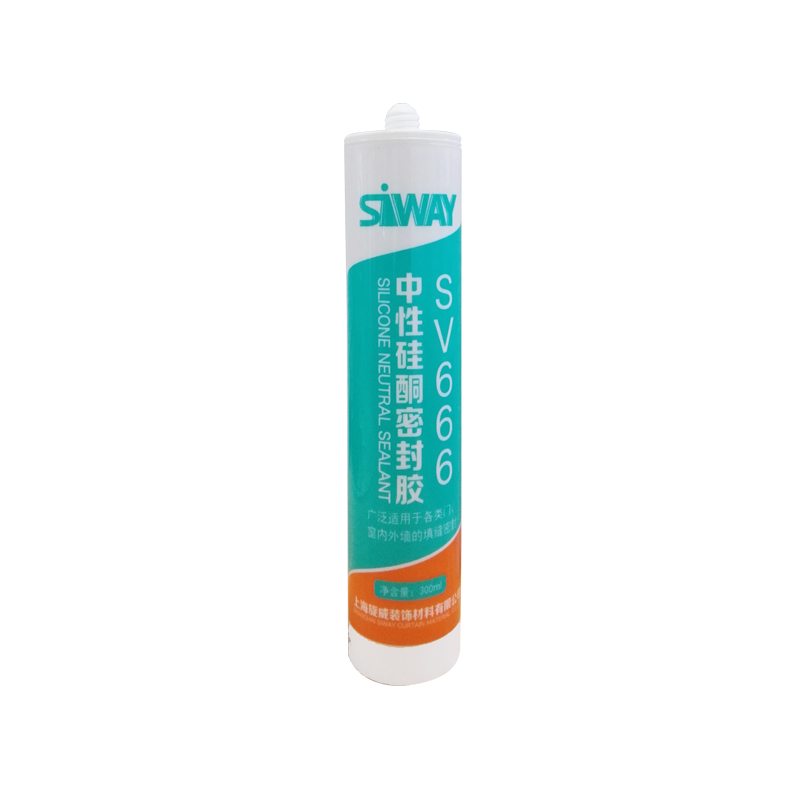
SV-666 neutral silicone sealant is a neutral curing glue single component, the modulus of the. It is specially designed for windows and doors caulking sealing general plastic doors and windows. It has good adhesion to glass and aluminum alloy, and has no corrosion.
Where to use
It is fit for multiple purpose sealing and bonding applications to form a silicone rubber adhering to adjacent substrates e.g. glass, ceramic, tile, wood and metal.
Key Features
1. 100% silicone
2. Easy to use
3. Waterproofing and weatherproofing
4. Primerless adhesion to most building materials
5. 12.5% movement capability
Technical data sheet
| Test standard | Test project | Unit | value |
| Before curing——25℃,50%R.H. | |||
| GB13477 | Flow, sagging or vertical flow | mm | 0 |
| GB13477 | surface drying time(25℃,50%R.H.) | min | 30 |
|
GB13477 |
Operating time | min | 20 |
| Curing time(25℃,50%R.H.) | Day | 7-14 | |
| Sealant curing speed and operating time will have different with different temperatures and temperature, high temperature and high humidity can make sealant curing speed faster, rather low temperature and low humidity are slower.21 days after curing——25℃,50%R.H. | |||
| GB13477 | Durometer Hardness | Shore A | 28 |
| GB13477 | The ultimate tensile strength | Mpa | 0.7 |
| Temperature stability | ℃ | -50~+150 | |
| GB13477 | Movement capability | % | 12.5 |
Certification
JC/T881-2001 12.5E;GB/T14683-2003 12.5E
Color
Black,White,Gray
Package
300ml in cartridge * 24 per box, 590ml in sausage *20 per box
Shelf life
12 months
Note
If you want the TDS or MSDS or other details, please contact with our sales person.
I think the well system made of Duct Seal is the best for installing a transducer on a kayak hull. (thru-hull).
I is easy to make, easy to undo or redo. No tools are required at all. No sanding no heavy cleaning required at all. It is the cheapest and the fastest. There is no waiting time. You make it and go fish.
Though, I found that gluing the transducer on the hull, regardless of glue types (including Duct Seal), is not quite dependable. Because there is an inherent problem that is air pockets or air bubbles form between the hull and the transducer.
Build a well for the transducer and fill the well with water is the best way to achieve consistent and accurate readings for a long period of time.
On the video, I explained and demonstrated why a transducer well made of Duct Seal is the best way for installing a transducer on a kayak hull.
Joe
This video shows 2 Glass Block Windows being installed in my basement windows. I can be reached on Facebook.
Contents, Rounded to nearest minute:
At 0:51 step 1: Materials needed;
At 1:32 step 2: Demolition of old wooden frame;
At 2:00 step 3: Mortar application to form rough opening;
At 6:07 step 4: Window insertion and setting with glass block mortar;
At 11:27 completed window installation minus silicone caulk.
Turn off CC unless you really need it. Some of my titles interfere with the closed caption titles.
Speaking does not begin until 2:24 just in case you think something is wrong with the sound.