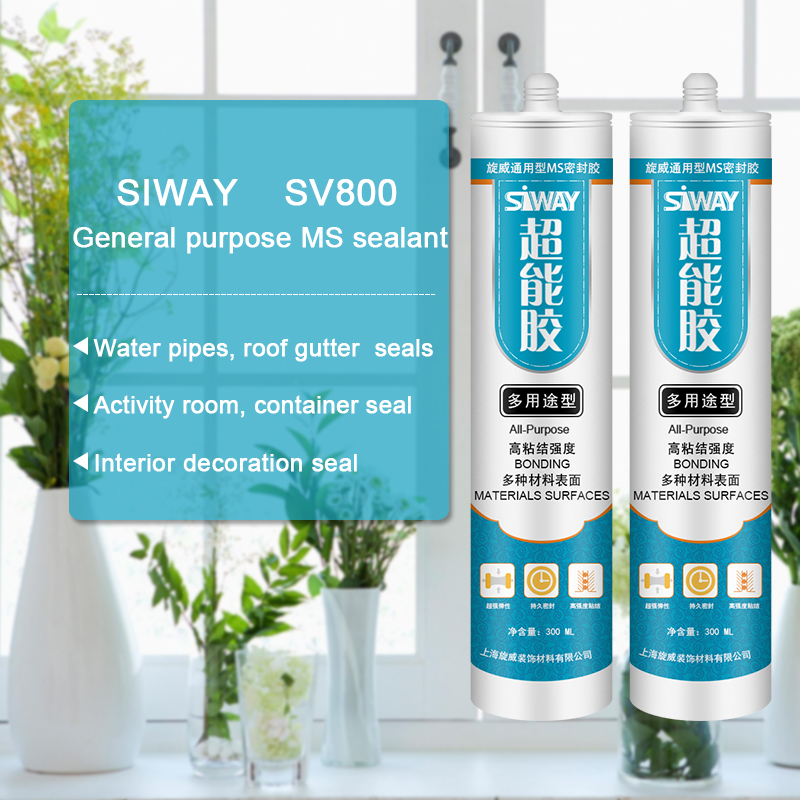
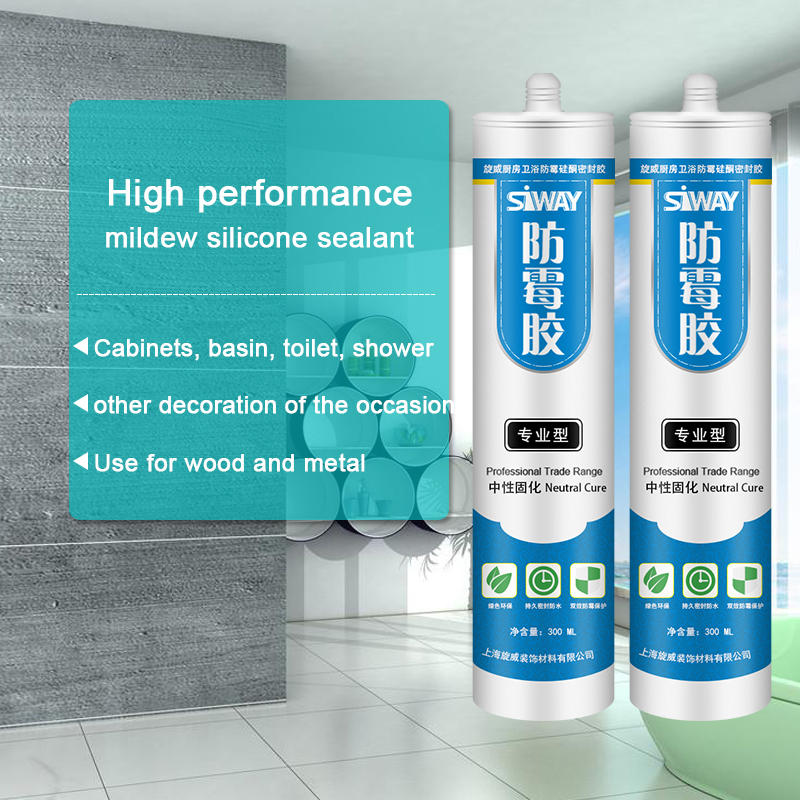
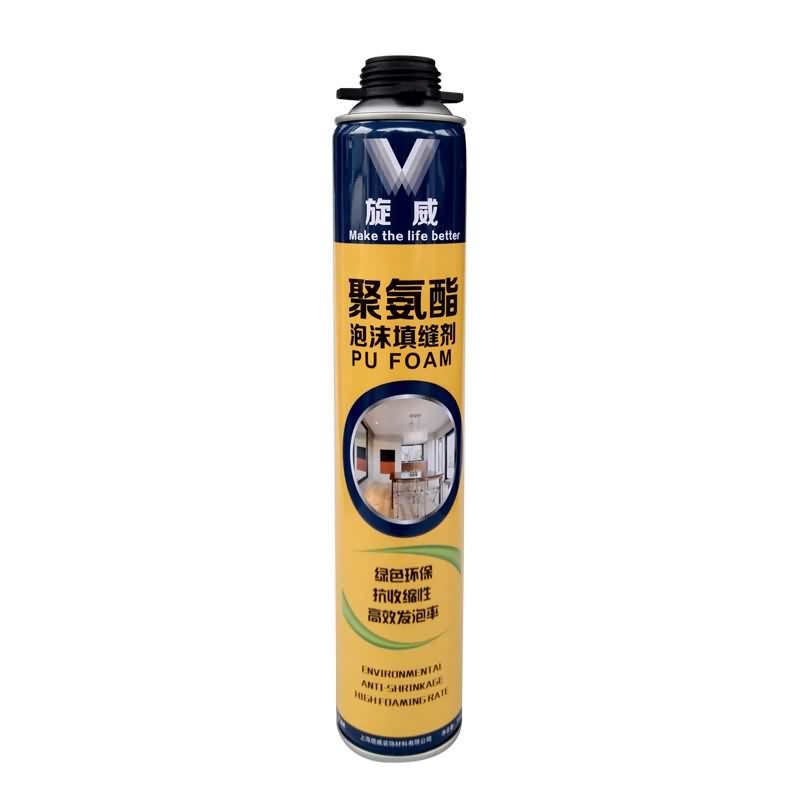
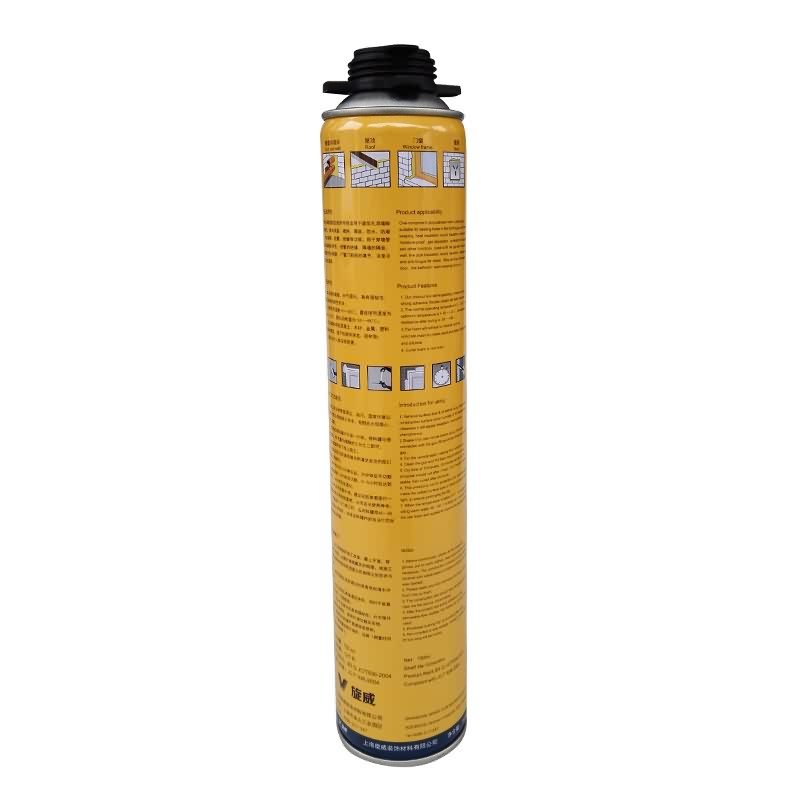
21 Years Factory Siway PU FOAM for Yemen Factory

Short Description:
Description This product is the expansion, moisture curing, has the strong cohesiveness, elastic foam obturator structure; Save work to save time, reduce waste; High bond strength; Bubble can stick in the concrete, wood, metal, plastic, such as base material surface, but not including teflon, silicon resins; Key Features 1. Noise silencing effect 2. Strong bonding strength 3. Water & weatherproof 4. Primerless adhesion to most building materials Basic Application 1.Doors and Windows a...
With advanced technologies and facilities, strict quality control, reasonable price, superior service and close co-operation with customers, we are devoted to providing the best value for our customers for 21 Years Factory Siway PU FOAM for Yemen Factory, Our tenet is clear all the time: to deliver high quality product at competitive price to customers around the world. We welcome potential buyers to contact us for OEM and ODM orders
Description
This product is the expansion, moisture curing, has the strong cohesiveness, elastic foam obturator structure; Save work to save time, reduce waste; High bond strength;
Bubble can stick in the concrete, wood, metal, plastic, such as base material surface, but not including teflon, silicon resins;
Key Features
1. Noise silencing effect
2. Strong bonding strength
3. Water & weatherproof
4. Primerless adhesion to most building materials
Basic Application
1.Doors and Windows and wall body between the gap filling sealing, fixed bond
2.Language lab, studio, etc when decorating, gap to fill
Technical data sheet
|
Project |
Value |
||
|
Density, Kg/m³,Not less |
10 |
||
|
Thermal conductivity,35℃,W/(m·K) no more than |
0.050 |
||
|
Dimensional stability(23±2)℃,48,h no more than |
5 |
||
|
Operating temperature |
-10~+35℃ |
||
|
Optimum operating temperature |
+18~+25℃ |
||
|
Temperature range(After curing) |
-35~+80℃ |
||
|
Tensile bond strength kPa Not less |
Aluminum plate |
Standard condition,7d |
80 |
|
Immersion,7d |
60 |
||
|
PVC plate |
Standard condition,7d |
80 |
|
|
Immersion,7d |
60 |
||
|
Cement Plate |
Standard condition,7d |
60 |
|
|
Shear strength,kpa,Not less |
80 |
||
|
Foam expansion ratio,Not less |
Standard value-10 |
||
Certification
JC 936-2004
Color
White
Package
750ml in Bottle * 12 per box
Shelf life
12 months
Note
If you want the TDS or MSDS or other details, please contact with our sales person.
Our How to Seal a Bath shows you all you need to know to do the job well and give you a neat and tidy finish.
Subscribe to the Wickes here: https://bit.ly/1WHJIIr
Sealing in between a bath and a tiled wall with silicone sealant is important because it prevents water from seeping between the two and causing damage. This short video shows you how to prepare the area for sealing, what to do to stop the sealant pulling away from the bath, how to use a cartridge gun to dispense the sealant, and how to dispense the right size bead as well as tips for getting an even, tidy finish.
Preparation & Planning
Make sure the area you’re going to seal is clean, dry and free from dust – especially if you’re removing old silicone sealant before applying a new one. It’s a good idea to weight the bath down by filling it with water. This helps you apply enough sealant to stop the seal pulling away from the bath when it’s full.
Getting the job done – hints & tips
Use a sanitary sealant as these often contain fungiside to inhibit mould growth which will help prolong the life of your bathroom seal. Make sure you leave your bath filled with water until the sealant is dry to avoid sealant coming away from the tiles when people use the bath.
Safety
Take care when using a stanley knife to cut off the top of the sealant. Always cut away from you. Wear protective gloves when using silicone sealant.
Watch more helpful DIY videos from Wickes below;
How to Home Maintenance with Wickes: https://bit.ly/28Se4IW
How to Kitchens with Wickes: https://bit.ly/28Ssbiy
How to Garden and Landscape with Wickes: https://bit.ly/28QcepH
How to Tile a Bathroom with Wickes: https://bit.ly/28Se8YT
How to Paint and Decorate with Wickes: https://bit.ly/28RusYN
For more tips and general advice on how to do it yourself from Wickes, you can visit;
Wickes Website: https://www.wickes.co.uk/
Wickes Facebook: https://www.facebook.com/Wickes.co.uk
Wickes Twitter: https://twitter.com/Wickes
Wickes Google+: https://plus.google.com/115389812299571602970/about
Wickes YouTube channel: https://www.youtube.com/user/wickesvideo
https://www.aucklandroofpainting.co.nz/ Wayne McDonnell from ARP takes you through the preparation needed before you paint a decramastic roof tile. The roof should be sprayed with a moss treatment first then the tiles checked for loose nails, dents and corrosion. Dents should be popped out and all loose nails hammered in or replaced. The roof can then be waterblasted and readied for re-chipping and painting. Get advice from the man with over 30 years experience.
Auckland Roof Painting offers decramastic roof repairs & resurfacing services Auckland wide by a highly experienced team of tradesmen.
https://www.aucklandroofpainting.co.nz/roof-repairs-painting/decramastic-roof-tiles/
Get guaranteed work – Contact us for a quote
https://www.aucklandroofpainting.co.nz/contact/